How to Make a Board Game With AI: Art, Cards, Board and Trailer
You can make a board game with AI by generating one key image that sets the art style, then using it as a reference for every card, the board, the box and the rulebook cover. Card names and rule text can be written straight into the prompt, and current image models spell them correctly. Once the art exists, the same images can drive a short video trailer, with AI narration, music and sound effects layered on top. The game design itself, the rules and the balance, is still yours.
What You Can Make for a Board Game With AI
A tabletop game needs more art than most people expect. Even a small card game has a box, a card back, a set of character or unit cards, location or resource cards, event cards, a board and a rulebook. AI handles all of these as images, and the same art can be reused for promotion.
Asset | Generator | Aspect ratio | What to watch |
Box cover | Create image | 1:1 | Title lettering, overall style (this image becomes the reference) |
Character cards | Create image + reference | 2:3 | Same style as the cover, name banner spelled right |
Location and event cards | Create image + reference | 3:2 or 2:3 | Numbers, short rule text |
Card back | Create image + reference | 2:3 | Symmetry, no stray text |
Game board | Create image + reference | 4:3 or 1:1 | Labels and numbers match the cards |
Rulebook cover | Create image + reference | 2:3 | Title and subtitle |
Trailer clips | Create video + reference images | 16:9 | Characters keep their look in motion |
Narration, music, sound effects | Create speech, Create music, Create sound effect | n/a | Pacing and pauses |
For the worked example in this guide we made Pigeon Post, a game for two to four players about rival pigeon couriers delivering letters across a 1930s harbour town. The full set came to 19 images and a 27-second trailer.
Before You Start: Write the Asset List
Decide what the game needs before you generate anything. Write down every card with its name, its number or cost, and any rule text that appears on it. Write the box title and the player count exactly as they should be printed. This list becomes your prompts, and having it ready keeps names, numbers and spelling consistent across the set.
Then pick one art style and describe it in a single reusable sentence. Name the medium, the palette and the era, for example "two-colour risograph print, cobalt blue and coral red ink on cream paper, grain, slight misregistration". That sentence goes into every prompt, word for word. Styles with a real-world origin (a printing method, an illustration tradition, a paint medium) give the model more to work with than vague words like "beautiful" or "detailed", and they make the whole set feel designed rather than generated piece by piece.
How to Make a Board Game With AI, Step by Step
1. Generate the key image that sets the style
Start with the box cover, because it carries the title, the main character and the world in one frame. Open Create image, write the style sentence, describe the scene, and put the title in quotation marks. Generate two or more variations and pick the one whose style you want on every card. We used Nano Banana 2.1 at 2K for the whole set, and both cover variations came back with the title and the player count spelled correctly.
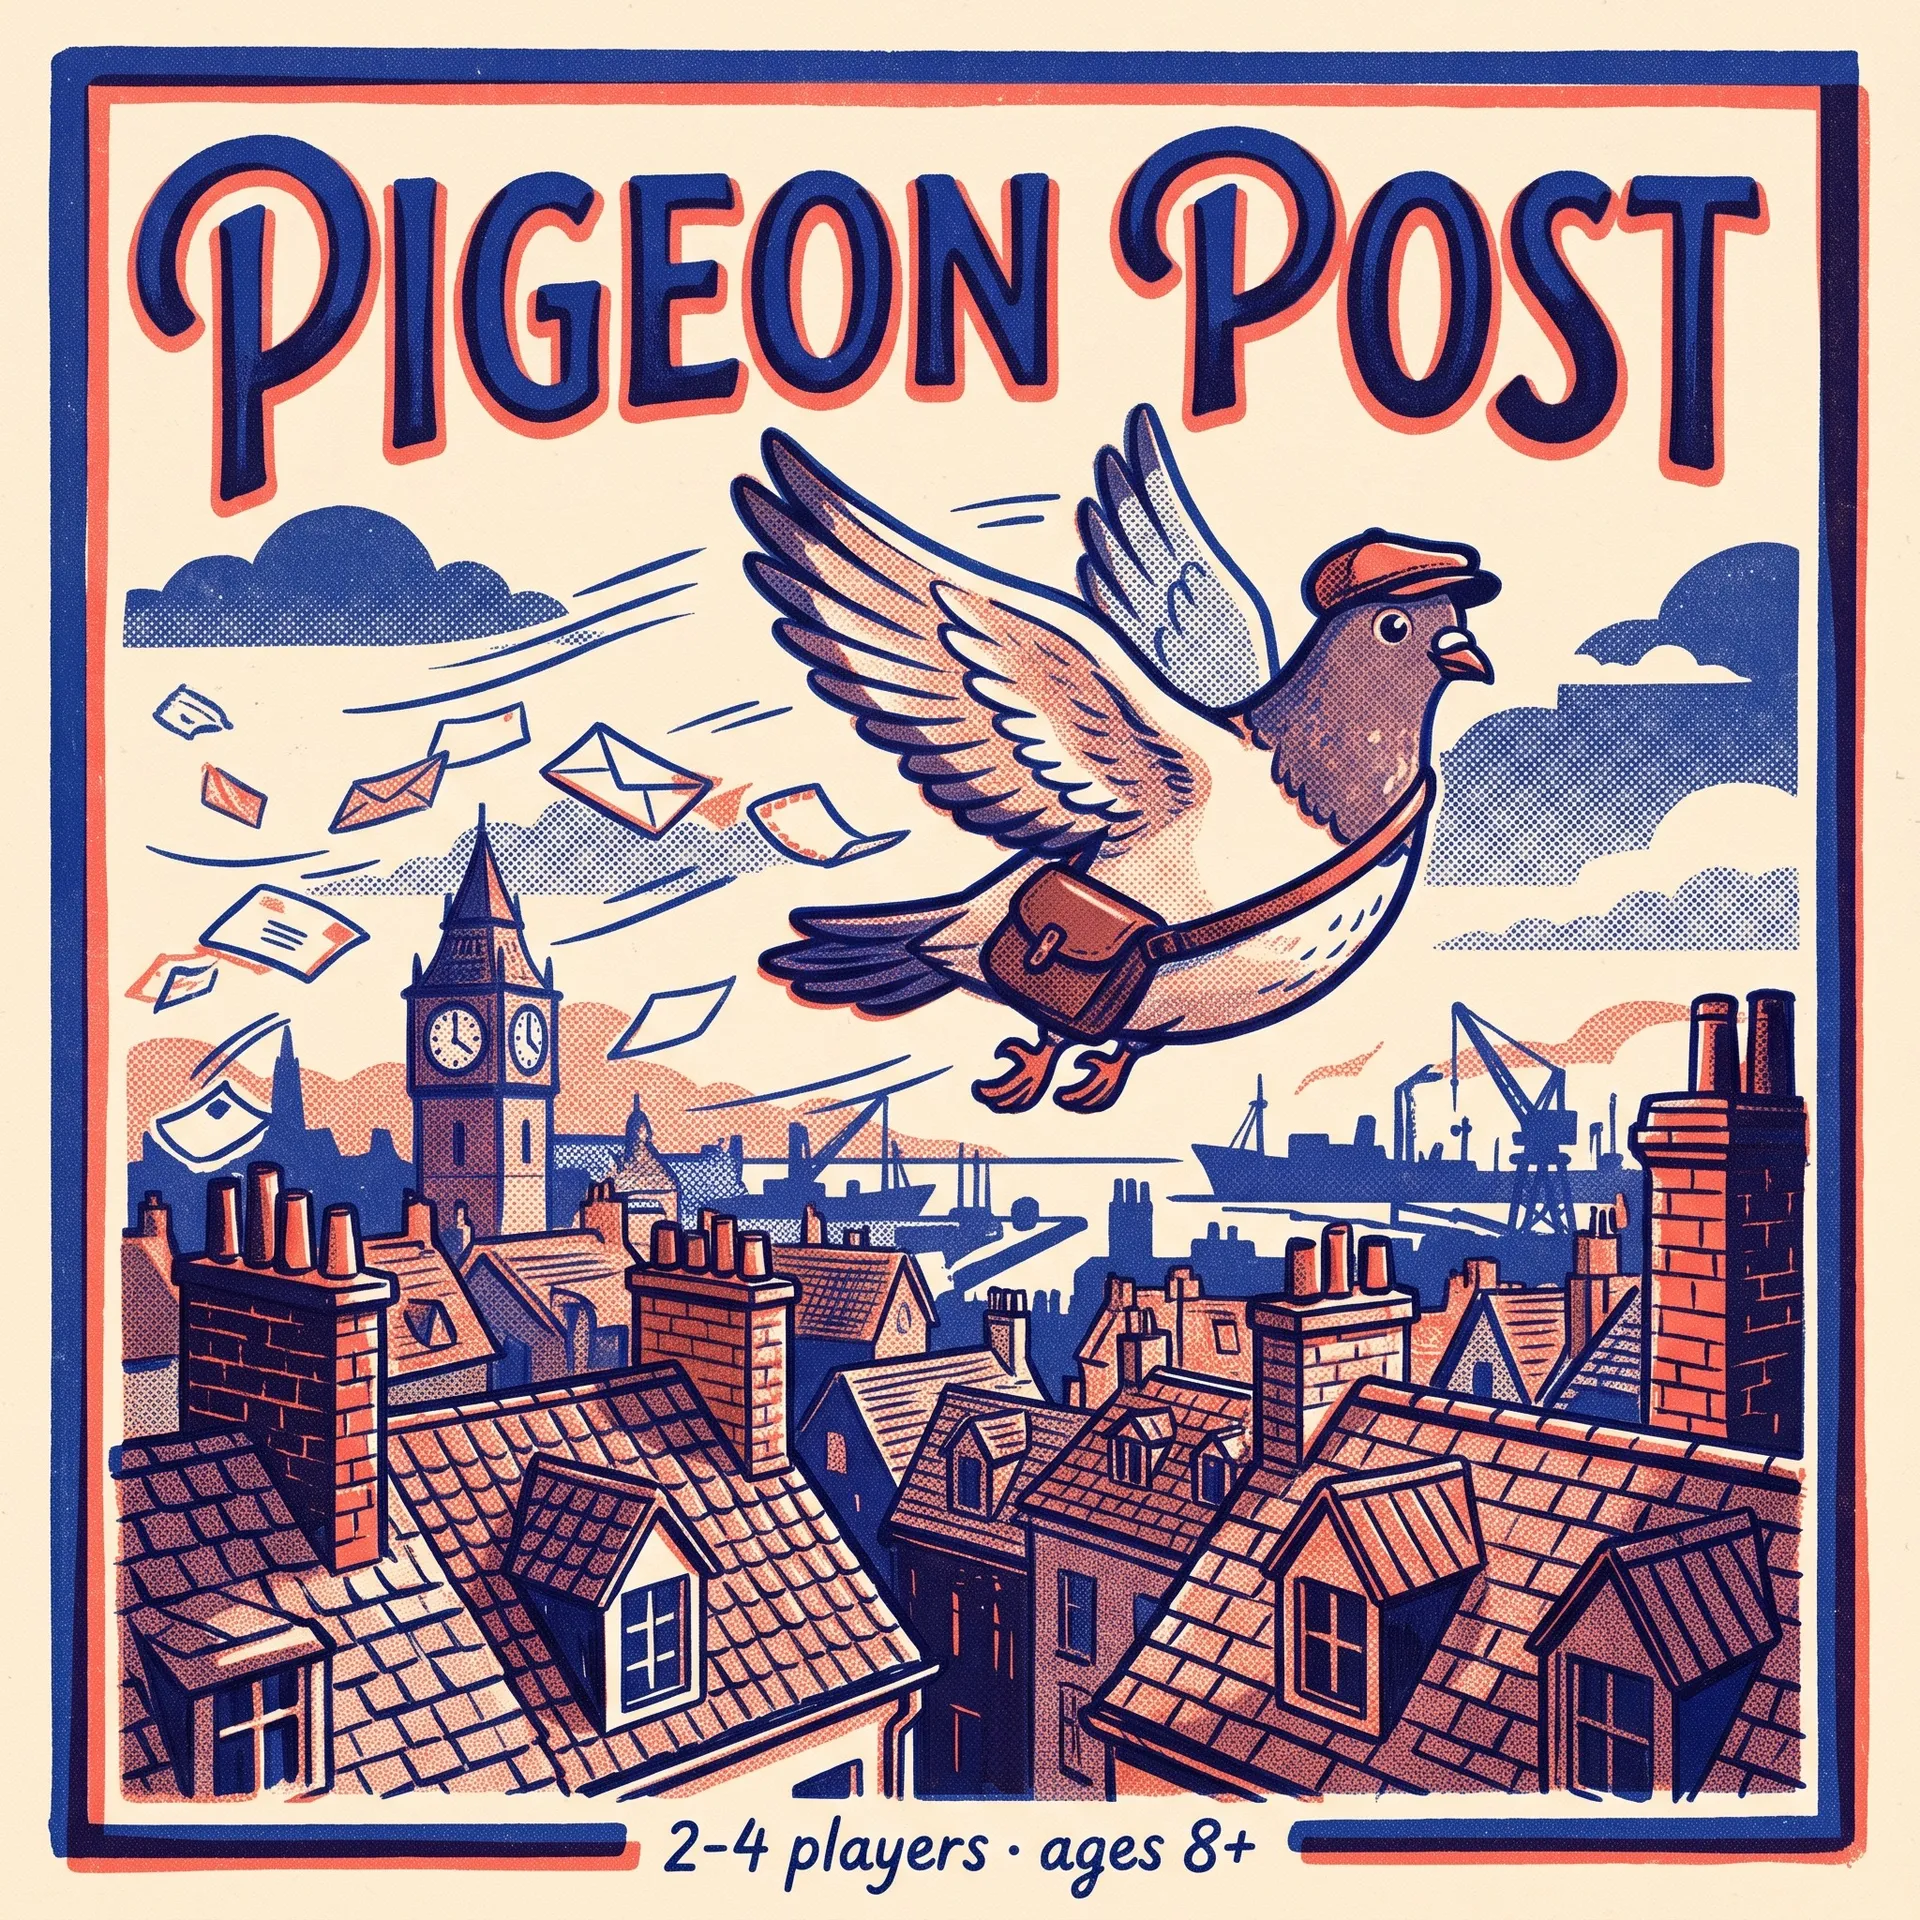
The key image: the Pigeon Post box cover, generated with Nano Banana 2.1. Every later card used it as a reference.
2. Make the character cards with the cover as a reference
Attach the chosen cover as a reference image and describe one game character per prompt: species or type, a costume detail that makes them easy to recognise, a pose, and the name for the banner. Repeat the style sentence and add "matching the reference image's exact style". Distinct costume details matter more than you might think. Old Barnaby has spectacles and a knitted scarf, Dash has aviator goggles, Muffin has an oversized postman's cap, The Countess has a monocle. Those details are what keep each character recognisable on a card, on the board and later in video. If a character will appear in many images, saving it as an Element lets you call it into later prompts by name. Our guide to consistent characters covers that in more depth.
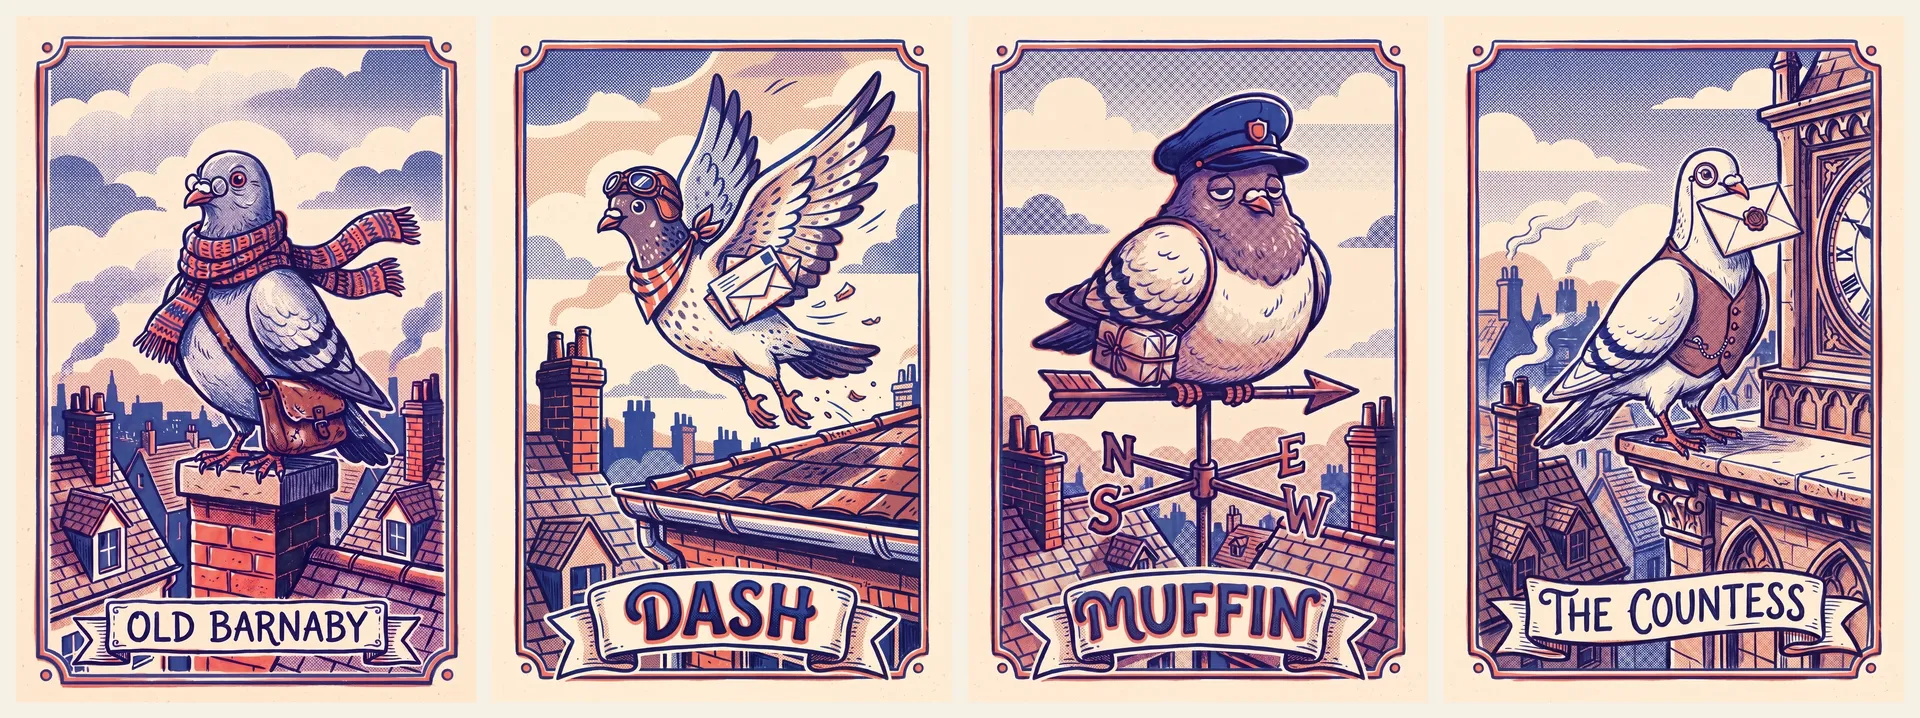
Four character cards generated in one run, with the box cover as the only reference image.
3. Generate locations and events in batches
Cards of the same type share a layout, so generate them together. Write one prompt per card with the same structure: style sentence, card type, scene, label text, badge or number. Attaching two references (the cover plus one finished card) helps the model copy both the style and the card frame. All six Pigeon Post locations came back in one batch with correct labels and numbers. The event cards carried a short line of rule text each, such as "Lose your top letter to the player on your left", and every word printed correctly. Keep rule text short; one sentence per card is reliable, a paragraph is not. Before moving on, look at every card at full size. If a detail is off, such as a stray letter, a repeated symbol or an element copied from the reference, fix it with a targeted edit: attach the image, name the one change in the prompt, and add "keep everything else exactly the same". For more on getting lettering right, see how to generate images with readable text.
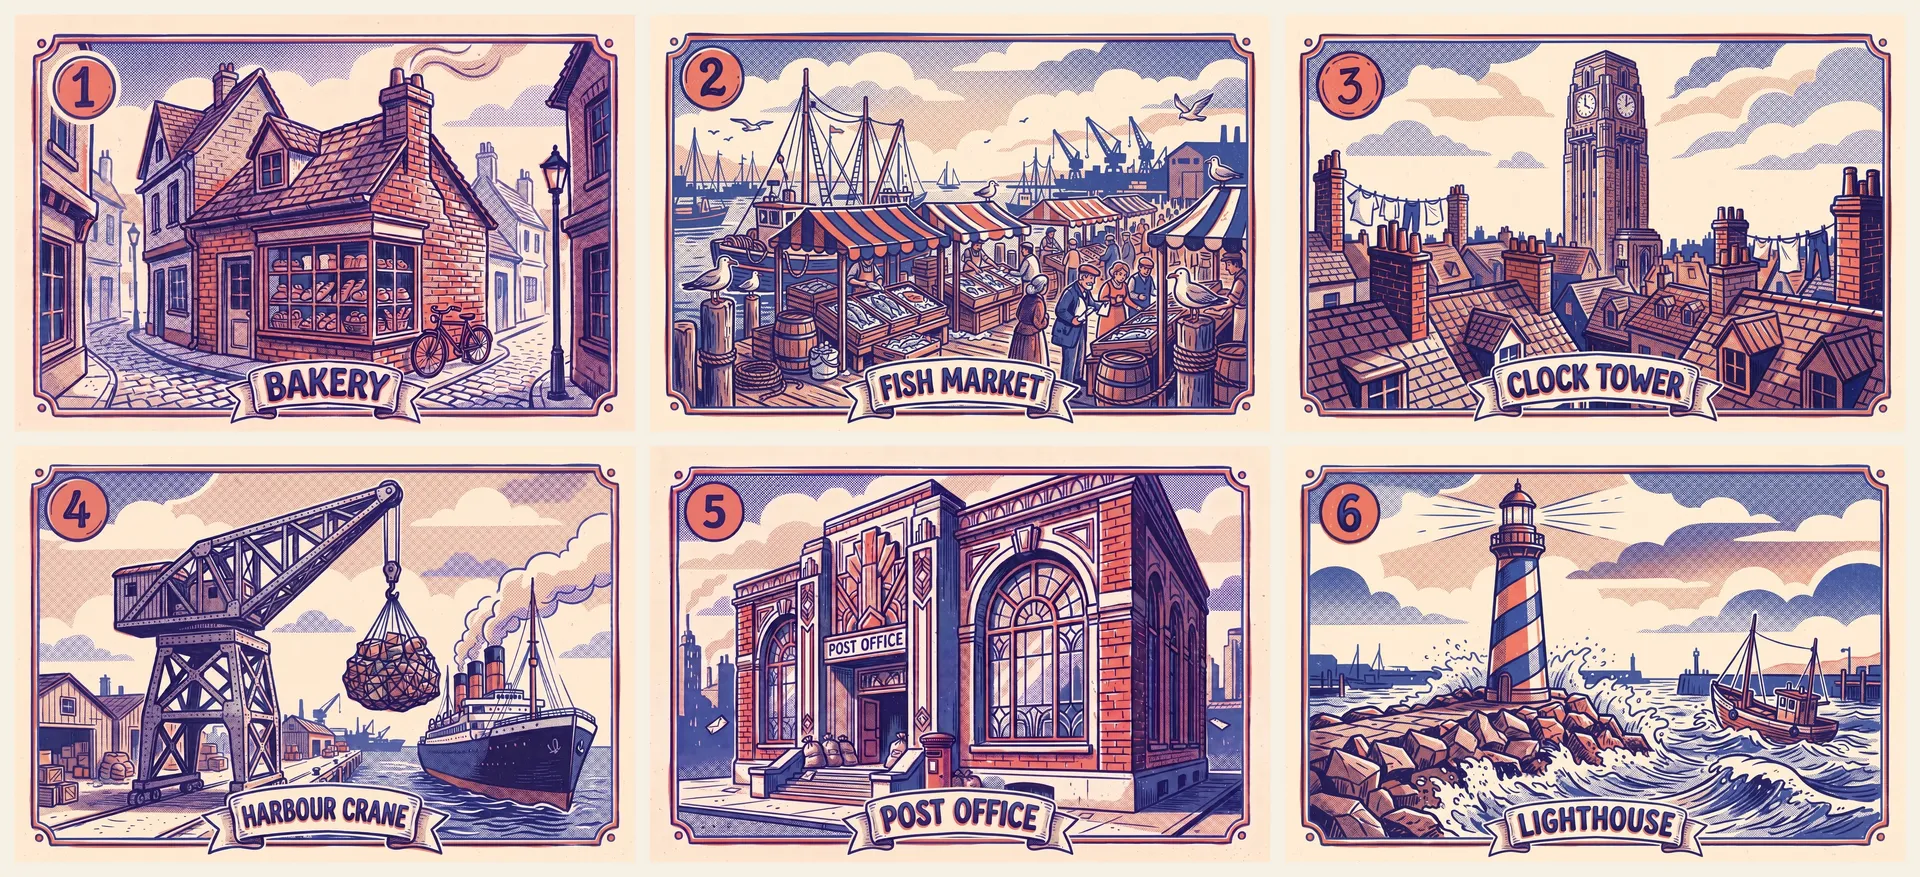
Six location cards from a single batch, each with its label and number.
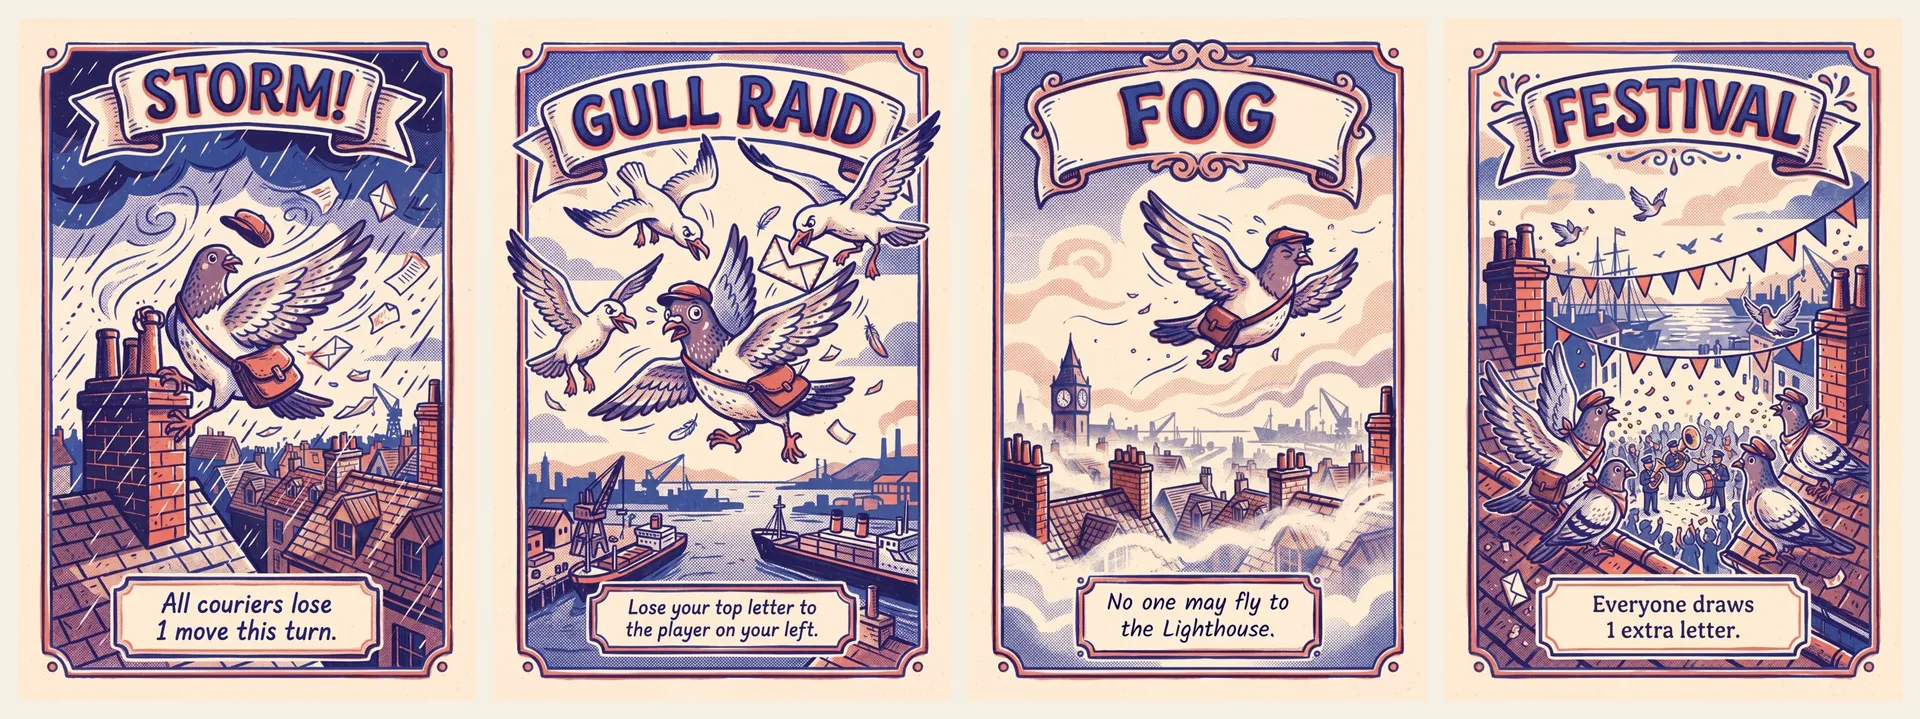
Event cards with the rule text written into the prompt.
4. Make the board, the card back and the rulebook cover
The board is the most complex image in the set, because it has to show every location in one map. Attach the cover and one location card as references, then list each landmark with its number in the prompt, for example "1 Bakery, 2 Fish Market, 3 Clock Tower". Ask for a dotted path of spaces linking them. The card back works best as a symmetrical emblem with a pattern around it. The rulebook cover is a simpler scene with the title and "How to Play".
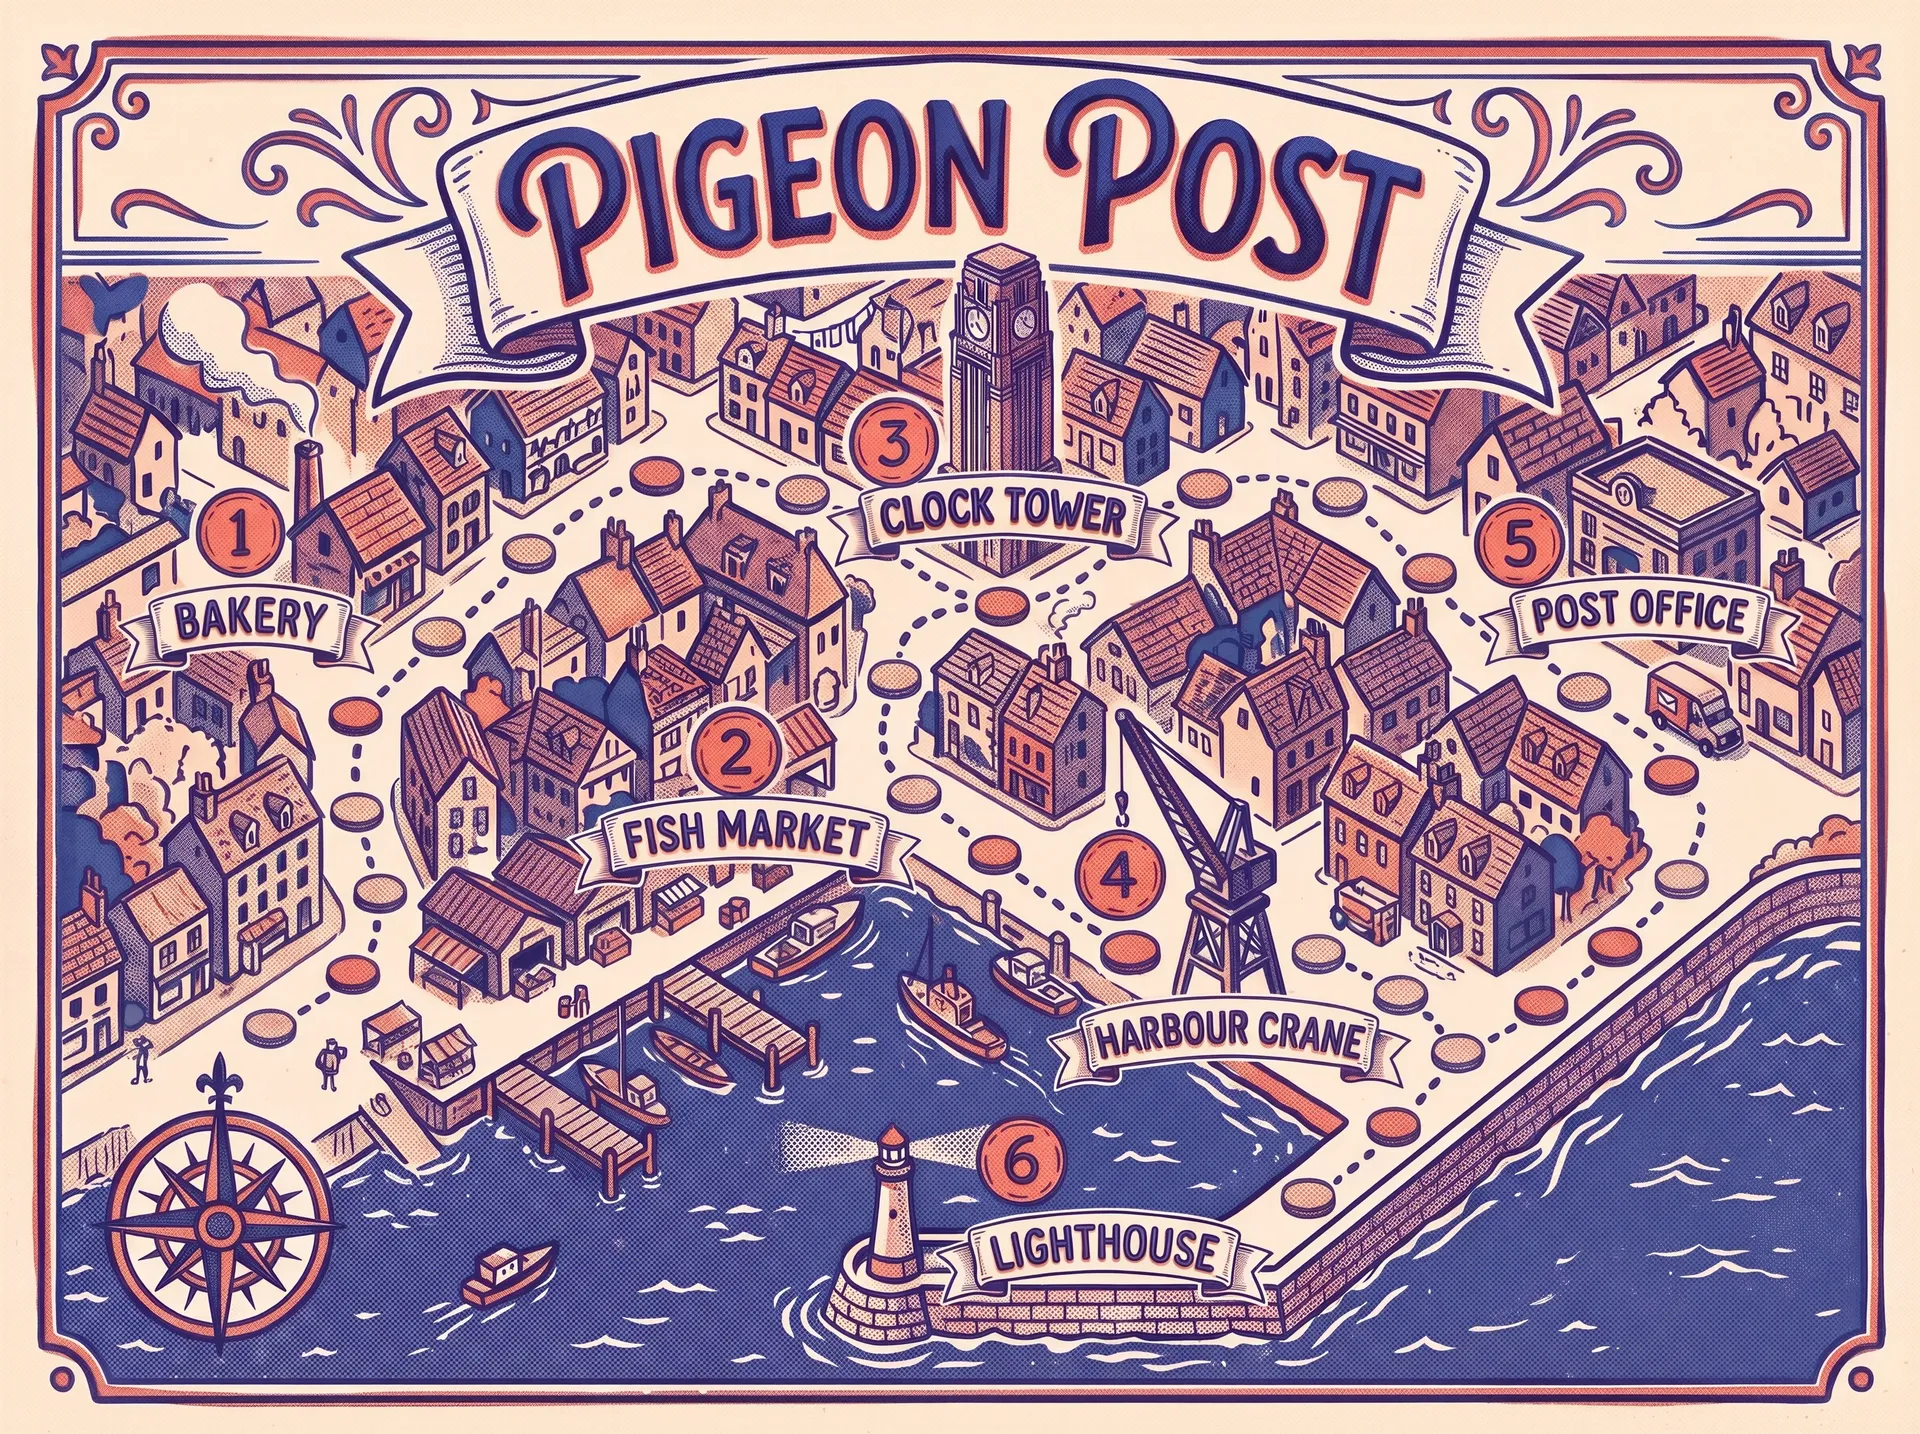
The game board, with every landmark labelled and numbered to match its card.
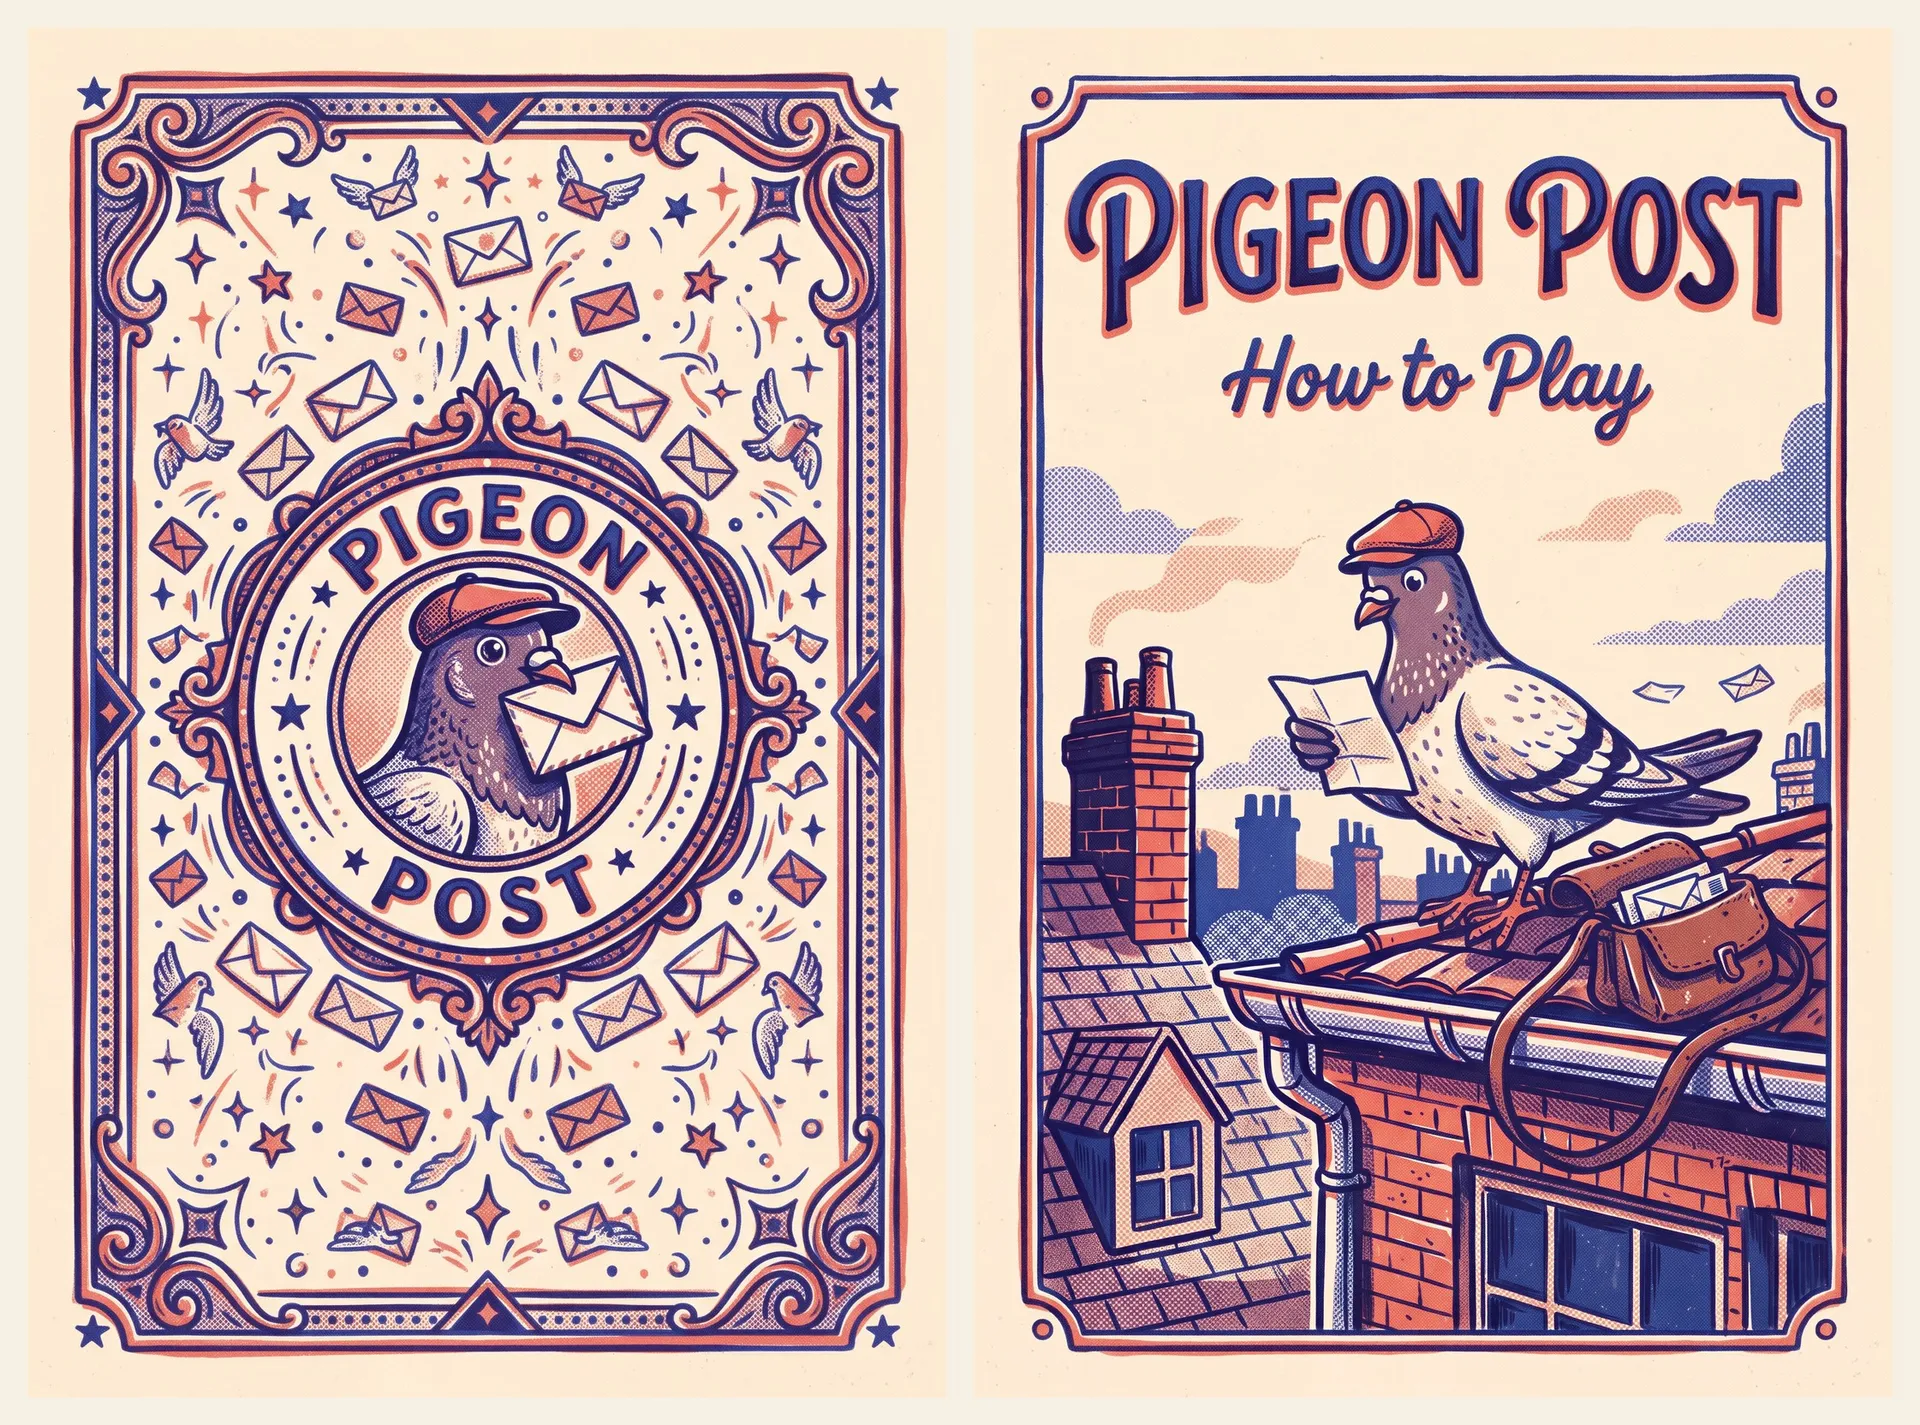
The card back and the rulebook cover, made with the same reference images.
5. Prepare the files for print
Generated images at 2K are 1696 by 2528 pixels in a 2:3 ratio, which is more than enough for a standard poker-size card (63 by 88 mm needs about 750 by 1040 pixels at 300 dpi). A box lid or a folded board is larger, so run those through Upscale image before sending them to a printer, and add bleed in your layout tool. Ask your print service for its templates first and generate at matching proportions.
6. Turn the cards into trailer clips
The finished art doubles as a storyboard. In Create video, pick a model that accepts reference images, attach the cards a shot needs, and describe the action. We used Kling 4.0 at 1080p for three 8-second clips: one character card and one location card per shot, cut together afterwards. The characters kept their goggles, caps and satchels in motion, and the print texture survived the animation. Plan each clip as one beat: a take-off, a chase, a closing shot that lands on the title.
You don't have to build the trailer from separate clips. Kling 4.0 generates up to 30 seconds in one go, so a short trailer can come out as a single generation with every scene described in one prompt. Separate clips are more useful while you are still working out the trailer. When a sequence has several scenes and you are not yet sure what you want, generating each scene on its own means a shot that works can stay, and only the one that doesn't gets regenerated, instead of redoing the whole trailer.
Shot 1: Dash takes off over the rooftops, animated with Kling 4.0 from the Dash and Clock Tower cards.
Shot 2: the gull raid, animated from the Gull Raid and Fish Market cards.
Shot 3: Muffin wakes up and flies off, animated from the Muffin and Clock Tower cards.
7. Add narration, music and sound effects
Write the trailer script as short lines, then generate it in Create speech. Delivery directions can go into the text itself, for example "read this as a classic movie-trailer narrator, deep and dramatic, with a wink of humour". Generate two takes and keep the one that fits your cut. For music, Lyria 3 Pro in Create music responds well to instruments, tempo and shape: "pizzicato strings, clarinet, accordion, bouncy 120 BPM, a comic build, a warm final chord". For a moment that needs punch, describe it in Create sound effect; our gull raid got squawks, a wing whoosh and a paper snatch, and the sleepiest character got a long cartoon yawn.
Trailer narration, generated in Create speech with the Algenib voice.
Music bed, generated in Create music with Lyria 3 Pro.
Gull raid sound effect: squawks, a wing whoosh and a paper snatch.
Yawn sound effect for the closing shot.
Trailer narration, generated in Create speech with the Algenib voice.
Music bed, generated in Create music with Lyria 3 Pro.
Gull raid sound effect: squawks, a wing whoosh and a paper snatch.
Yawn sound effect for the closing shot.
8. Cut it together
Place the clips in order with short crossfades, lay the narration on top, and keep the music low under the voice. End on a title card, such as a widescreen version of the box cover, and time the dissolve into it for the pause just before the final line, so the title and the tagline arrive together. If two lines run into each other, add silence between them in the editor. In our cut, an extra second before the tagline made the ending land much harder than the original read.
The finished 27-second trailer: three Kling 4.0 clips, narration, music and two sound effects, all generated on getimg.ai.
How to Keep Every Card in the Same Style
Style drift is the most common problem when people make game art with AI, and it comes from changing too many variables between prompts. Three habits prevent it. Reuse the exact same style sentence in every prompt, without paraphrasing. Attach the same anchor image (the box cover) as a reference on every generation, plus one finished card of the same type when you make a new batch. And keep the model and resolution fixed for the whole set, because each model interprets a style differently. With those three in place, the 19 Pigeon Post images matched closely enough to sit on one table. Small drift still happens in details like badge shapes or border ornaments; catch it during review and fix it with an edit rather than regenerating from scratch. The same approach works for any visual system, from a game to a product line, as covered in our guide to a consistent brand style.
What AI Board Game Art Is Good For
AI-generated art fits several stages of a tabletop project. For a prototype, it replaces stick figures and placeholder text, which makes playtesters take the game more seriously and gives them a feel for the theme. For a pitch to a publisher or a crowdfunding page, a full matching set plus a trailer shows the finished vision far better than a description. For self-published and print-on-demand games, the art can go to print once it has been reviewed and upscaled.
Two things stay with the designer. The first is the game: rules, balance, player count and how long a turn takes. AI can draw a Storm card; it cannot tell you whether losing one move is too harsh. The second is final review. Check every card at print size for spelling, numbering and small details, because a mistake on one card is printed a thousand times. Use of the output for a commercial product is subject to the platform's terms and to other people's rights, so avoid real brands and characters you don't own.
The Bottom Line
Making a board game with AI comes down to one anchor image, a reusable style sentence and an exact asset list. Generate the cover first, build every card and the board from it as a reference, review every card and fix details with targeted edits, and then reuse the finished art to make a trailer with voice, music and sound. The whole Pigeon Post set, 19 images and a trailer, took one afternoon. Start your own game's key art in Create image.
Frequently Asked Questions
AI can make all of the visual assets of a board game: the box, cards, board, card back, rulebook cover and a promotional trailer. It does not design the game itself. Rules, balance, player count and playtesting are still the designer's job. A practical split is to design and playtest with paper first, then generate the art once the card list is stable.
Generate one key image first, usually the box cover, and attach it as a reference image to every later prompt. Repeat the same style sentence word for word in each prompt and keep the same model and resolution for the whole set. Adding one finished card of the same type as a second reference also helps the model copy the card frame.
Yes. Current image models such as Nano Banana 2.1 render short text reliably when it is written in quotation marks in the prompt: card names, numbers and one-sentence rules. Longer rule blocks are less reliable, so keep printed text short or add longer rules in a layout tool. Always proofread every card at full size.
A standard poker-size card (63 by 88 mm) needs about 750 by 1040 pixels at 300 dpi, so a 2K image in a 2:3 ratio is more than enough. Larger pieces such as a box lid or a game board need more pixels; upscale them before printing and add bleed according to your print service's template.
Yes. Use the finished card art as reference images in a video model that accepts them, such as Kling 4.0. It can generate a trailer of up to 30 seconds in one go, or you can generate one short clip per scene, which makes it easier to redo a single scene while you are still deciding what the trailer should be. Add narration with a text-to-speech generator, a music track and sound effects, then cut the clips together in any video editor.
In many cases, yes, but commercial use is subject to the terms of the platform you generate with and to other people's rights. Avoid real brands, logos and existing characters, review every image before print, and check the rules of the store or crowdfunding platform you plan to use, as some ask creators to disclose AI-generated art.
Related Articles