Guide to Image to Image
Master getimg.ai's Image to Image feature. Discover how to use your photos as a base for AI-generated art in this comprehensive step-by-step guide.
What is Image to Image?
Image to Image is a powerful feature in getimg.ai's Image Generator that allows you to use an existing image as a starting point to create variations of it that are more or less (depending on your chosen settings) similar to the original.
This feature is available in Essential mode (for selected models: FLUX.1 [dev], FLUX.1.1 [ultra], and legacy getimg.ai models), and in SD mode.
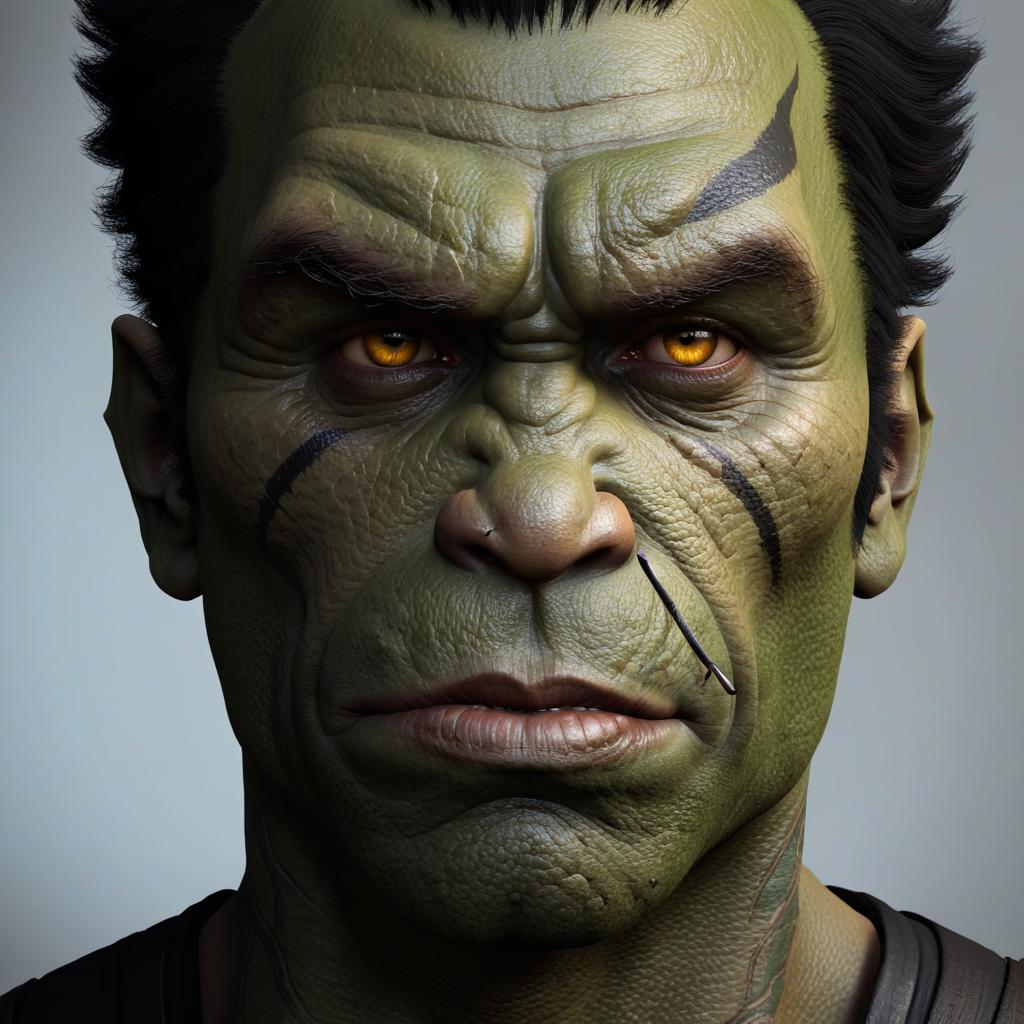
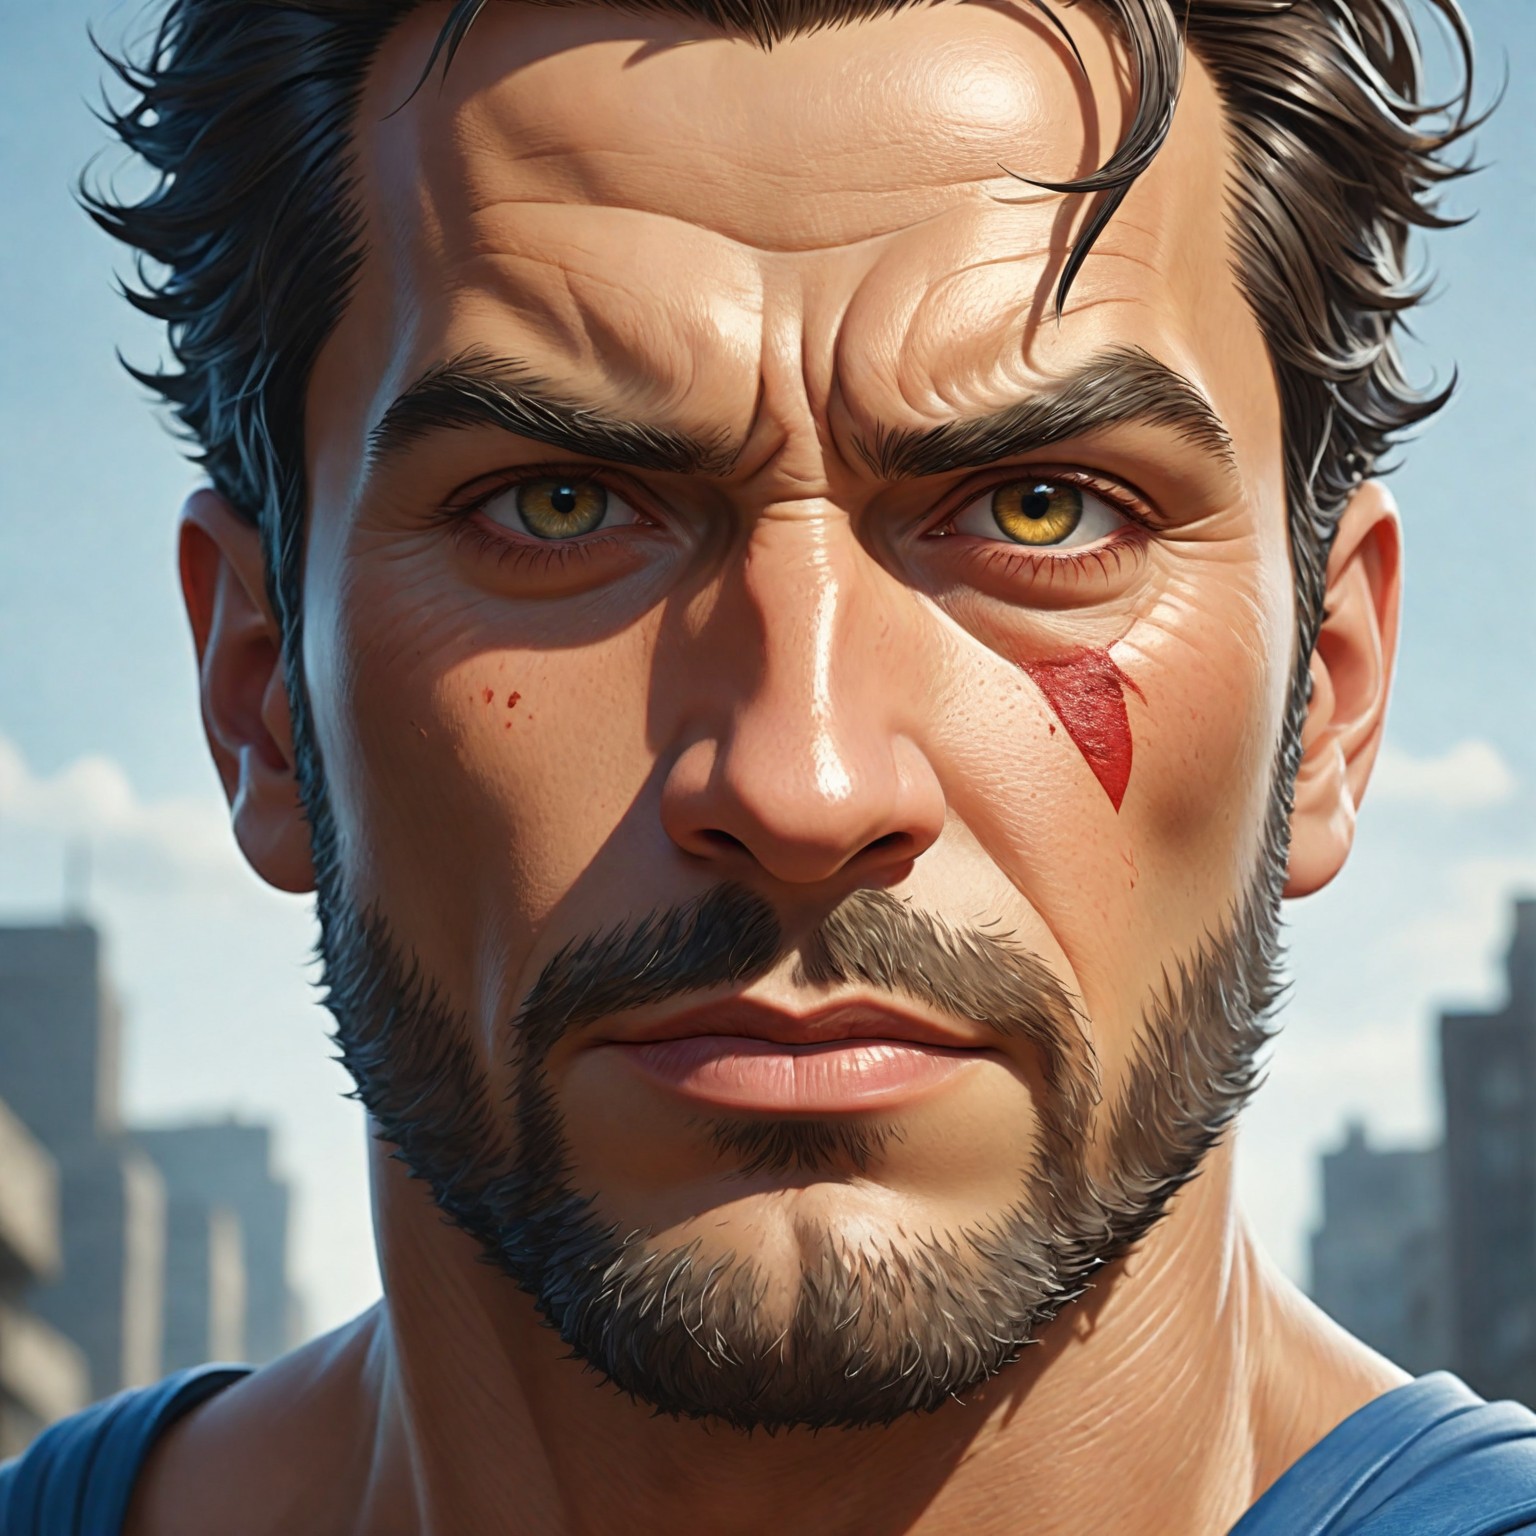
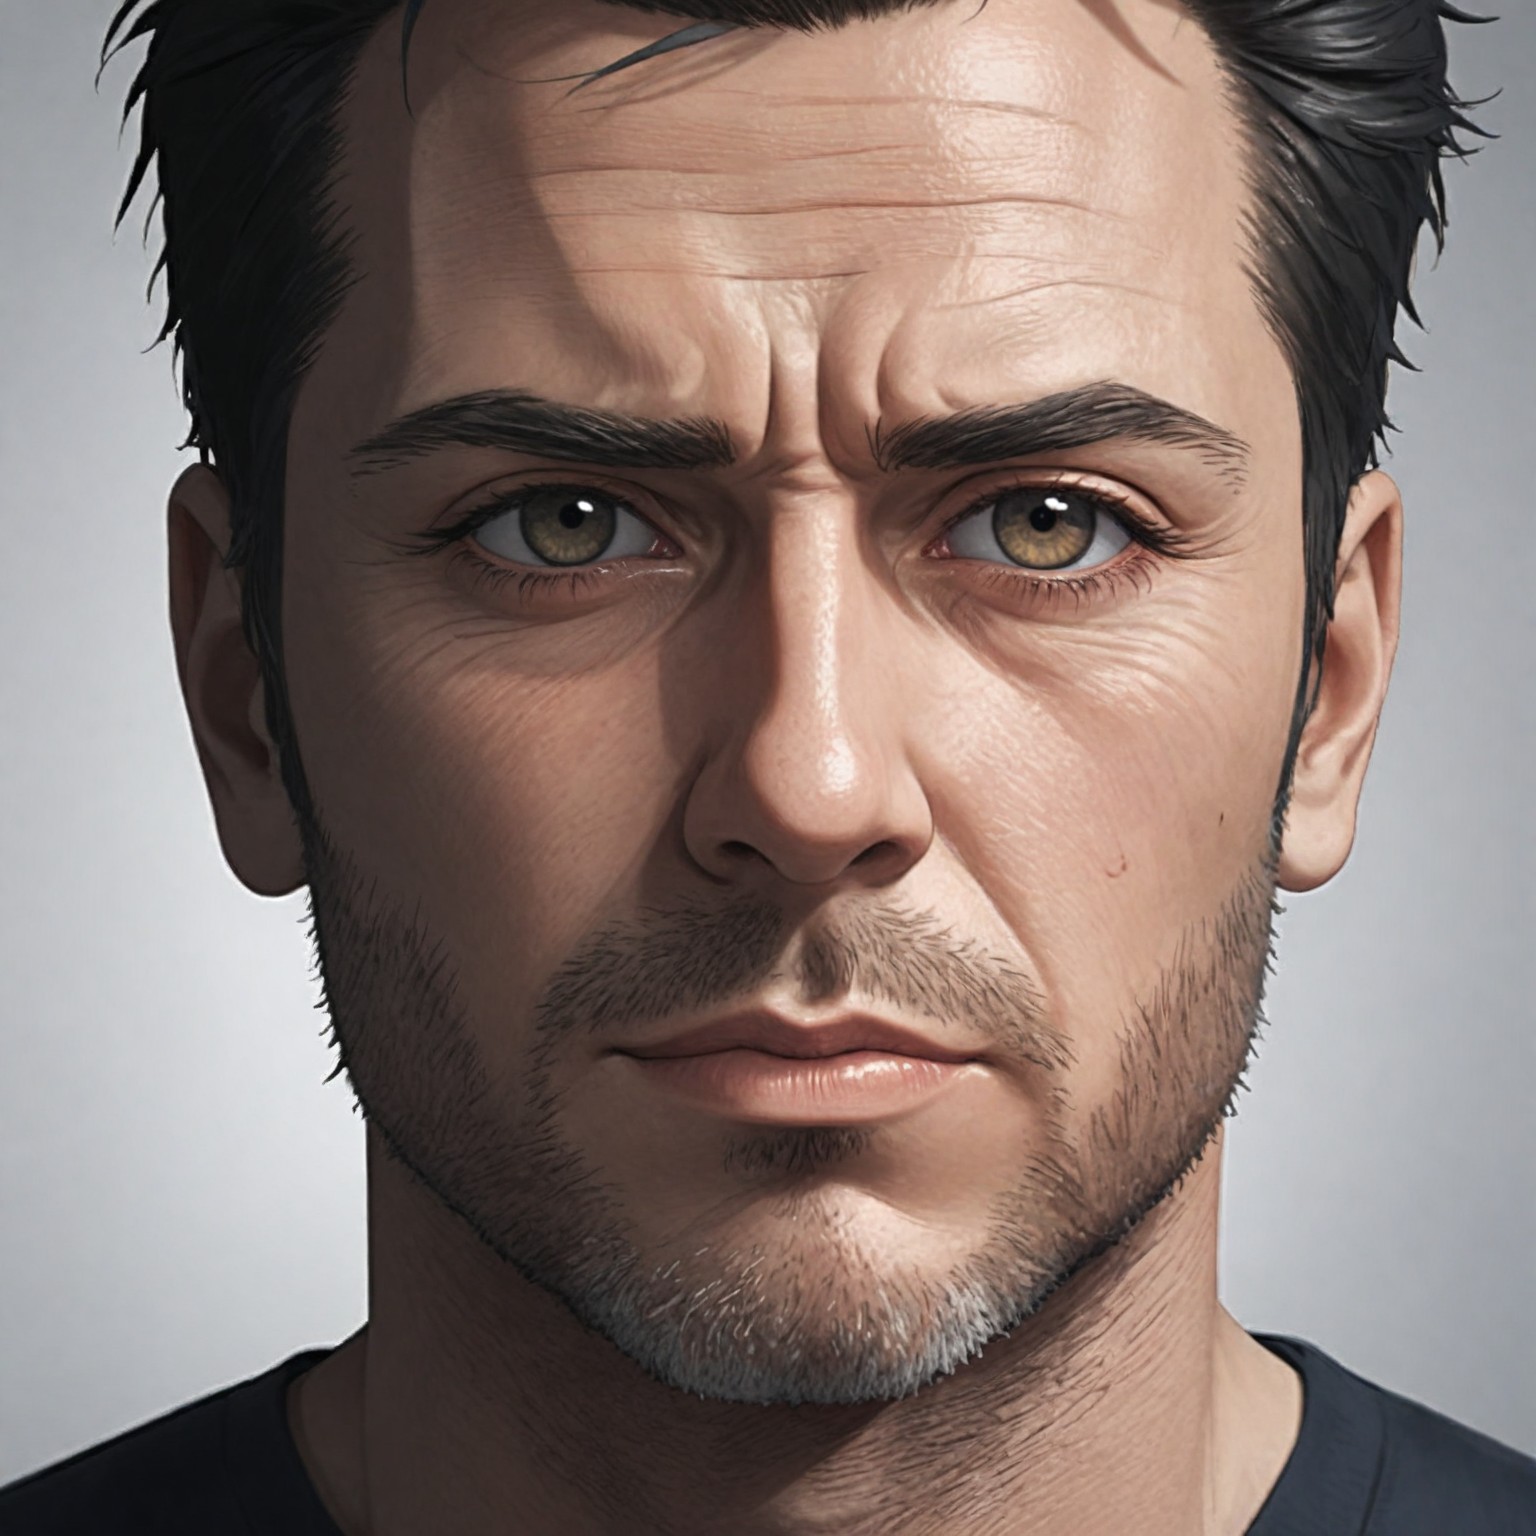
Let’s say you are an artist who created an amazing realistic portrait. To make the most of it, you can use the Image to Image feature to quickly turn it into a:
- fantasy illustration that will serve as a DnD portrait,
- watercolor painting,
- anime character,
- comic book frame.

Base image
"fantasy illustration, orc"
"comic book superhero"
"anime character"
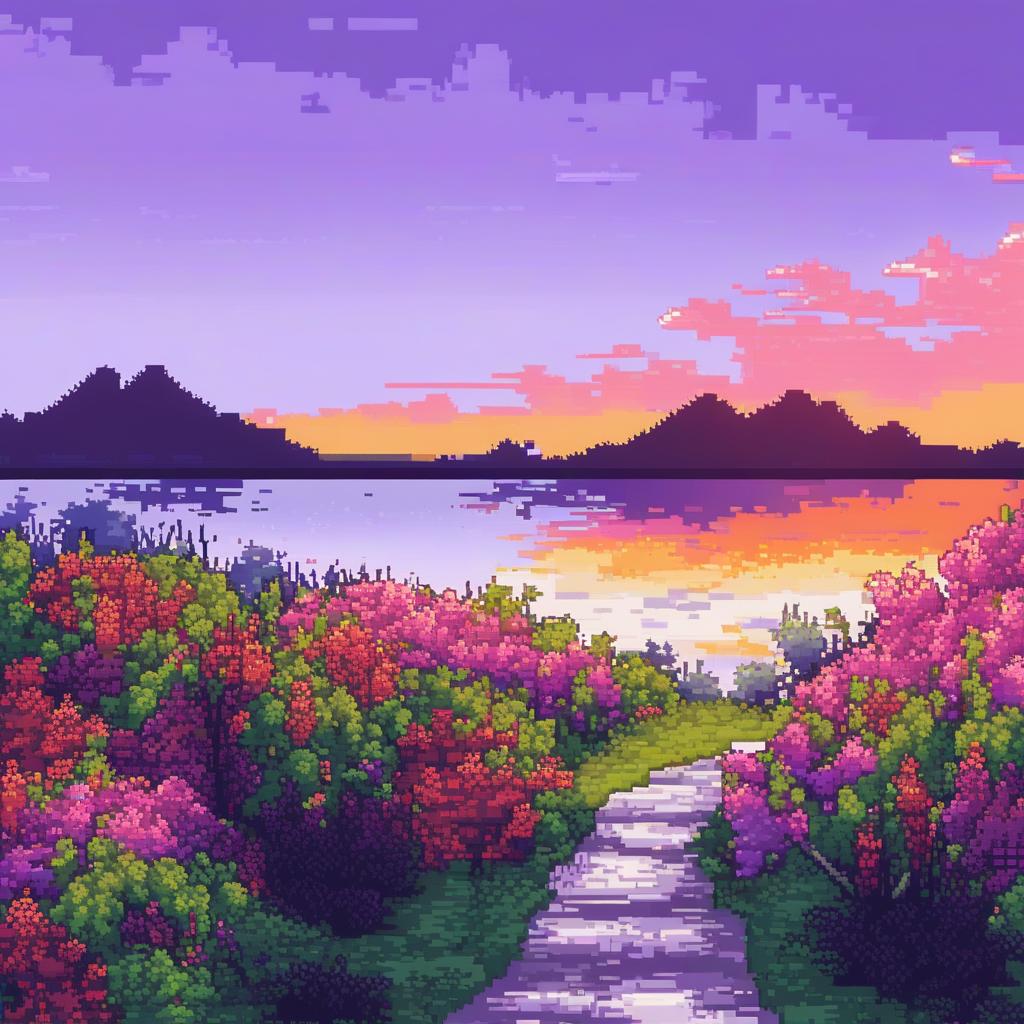
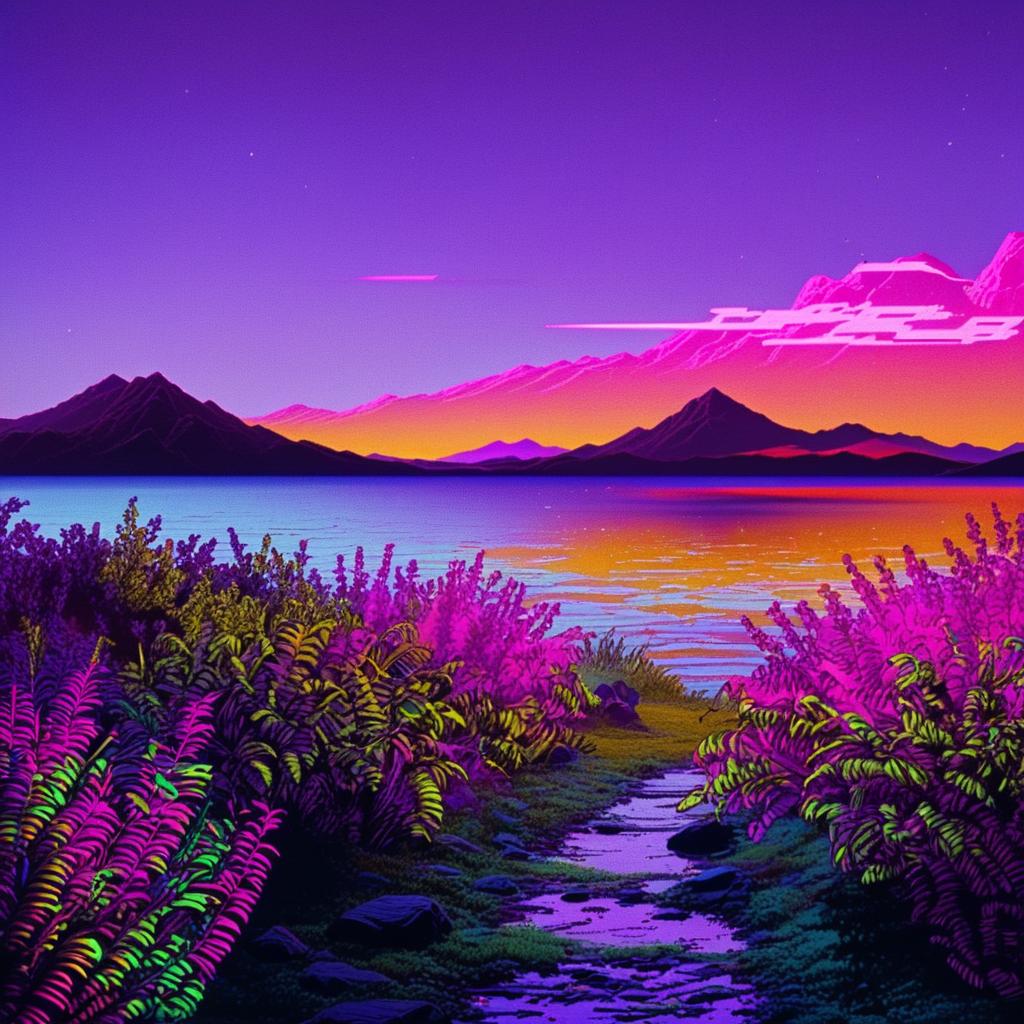
Or maybe you’re a marketer who wants to make your blog posts’ featured images stand out. With Image to Image, you can take a basic landscape photo and effortlessly transform it into a:
- textured oil painting,
- Salvador Dali-inspired abstract creation,
- pixel art image to add a touch of fun,
- eye-catching neon-colored synthwave artwork.
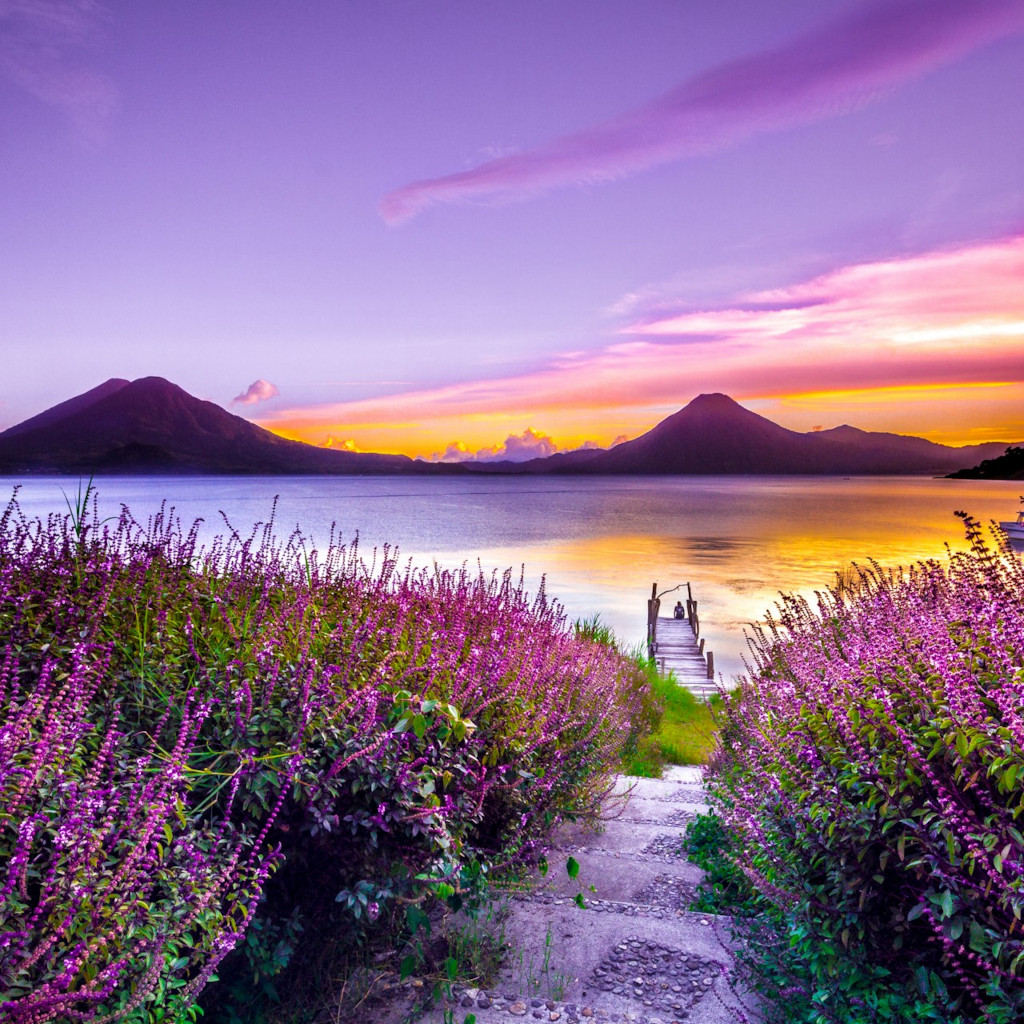
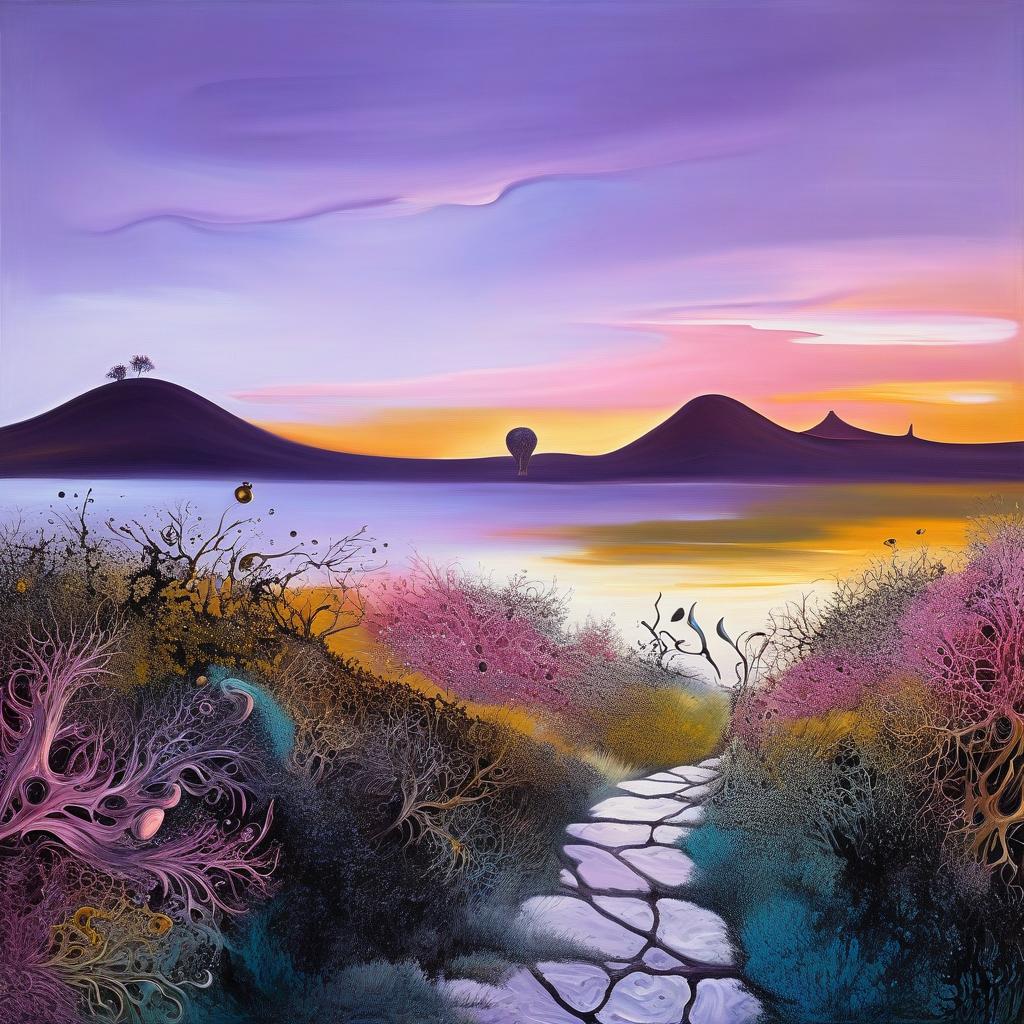
Base image
"landscape, painted in the surrealist style of Salvador Dali"
"landscape, pixel art, 16x16 pixels, vibrant colors"
"landscape, synthwave art, neon colors"
Using Image to Image: a step-by-step instruction
Step 1. Write a prompt
Go to the Image Generator and write a prompt describing the image you want to create. This prompt should include any specific adjustments you wish to make.
Imagine you have a nice photo of your pet, and you want to see how it would look as a Pokémon. The prompt for that can be as simple as “Pokémon style”.
If you’re using Image Generator's SD mode, fill in the negative prompt (what you want to avoid in your image) as well.
Step 2. Select a model
Select the style or model you’d like to use. The Image to Image feature works with FLUX.1 [dev], FLUX.1.1 [ultra], and getimg.ai's legacy models in the Essential mode, as well as all the models in the SD mode.
For best results, make sure the model you choose suits the type of results you’d like to achieve. For example, if you want to turn your photo into a painting, the “Artistic” style in the Essential mode is a good option.
Step 3. Choose an image
Upload an image you’d like to create variations of into the Image Reference section of the Image Generator. You can add an image from:
- your device: by dragging a file from its location into the designated area or by clicking the upload button to select a file manually,
- Image Generator: by dragging an image from the generation results or by hovering over it and clicking the “Use as image reference” icon.
Ensure the Image Reference type is set to “Image to Image”—it’s always the first option on the list.
When uploading your reference images, we recommend maintaining the same aspect ratio for both the source and output images. The images may stretch if the aspect ratios differ, leading to suboptimal results.
If you're using the SD mode, you can select the “Crop image references to fit output aspect ratio” option, but be mindful that it does not always guarantee a great outcome. Images will be cropped at the center, which, depending on their composition, may lead to important parts getting removed.
There is no such option in FLUX.1 [dev] and FLUX.1.1 [ultra], so make sure to match input and output image aspect ratios for the best results!
Step 4. Adjust the reference strength
Once your image is uploaded, you can control how closely the new image will resemble the original by adjusting the strength parameter:
- setting a higher strength value will make the new image more similar to the original; this is ideal if you want to maintain the core features of your source image while making subtle changes,
- conversely, lowering the strength value will lead to a greater divergence from the original image, allowing for more creative freedom and experimentation.
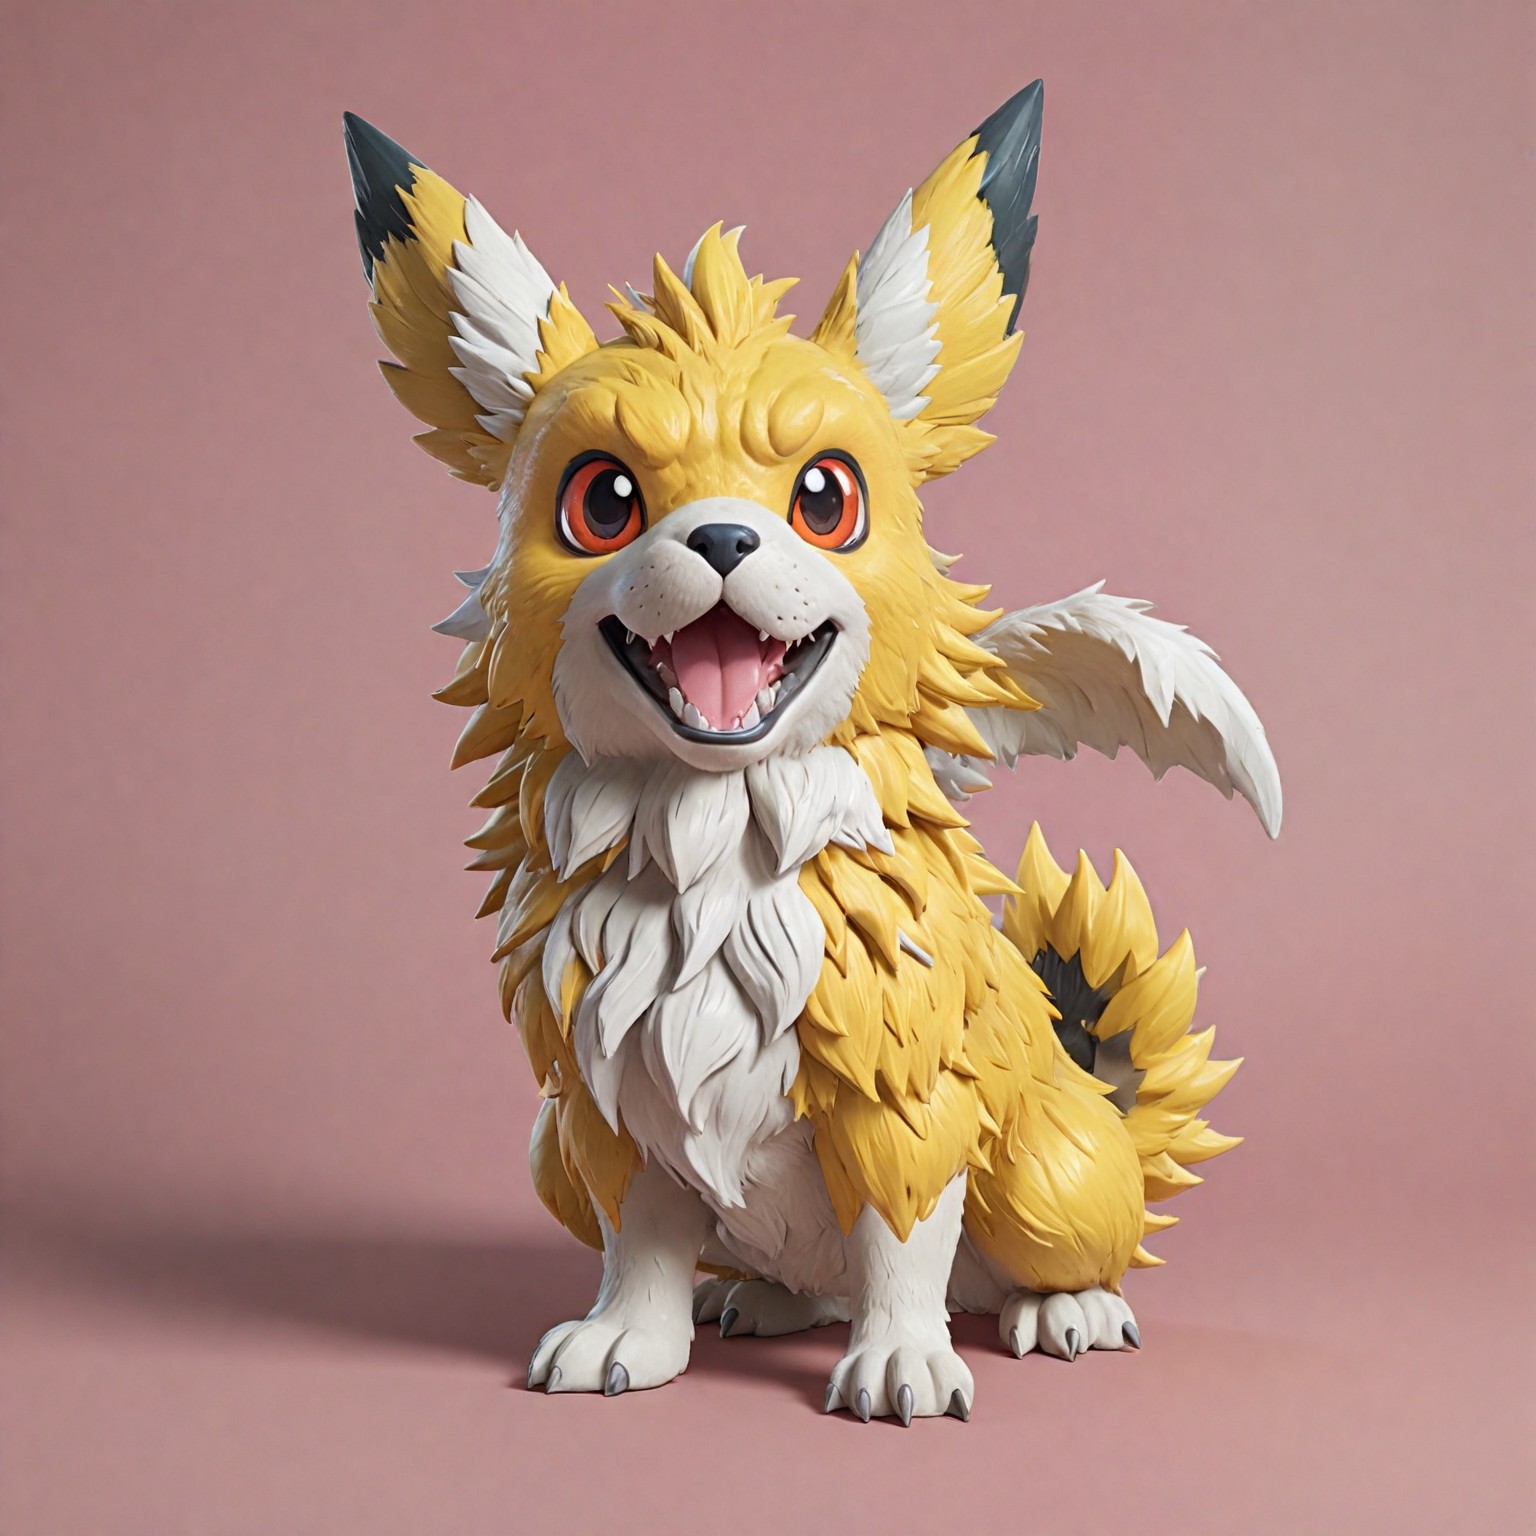
Continuing with our Pokémon idea, if you set the reference strength too high, you might barely see the difference between the source image and the output.
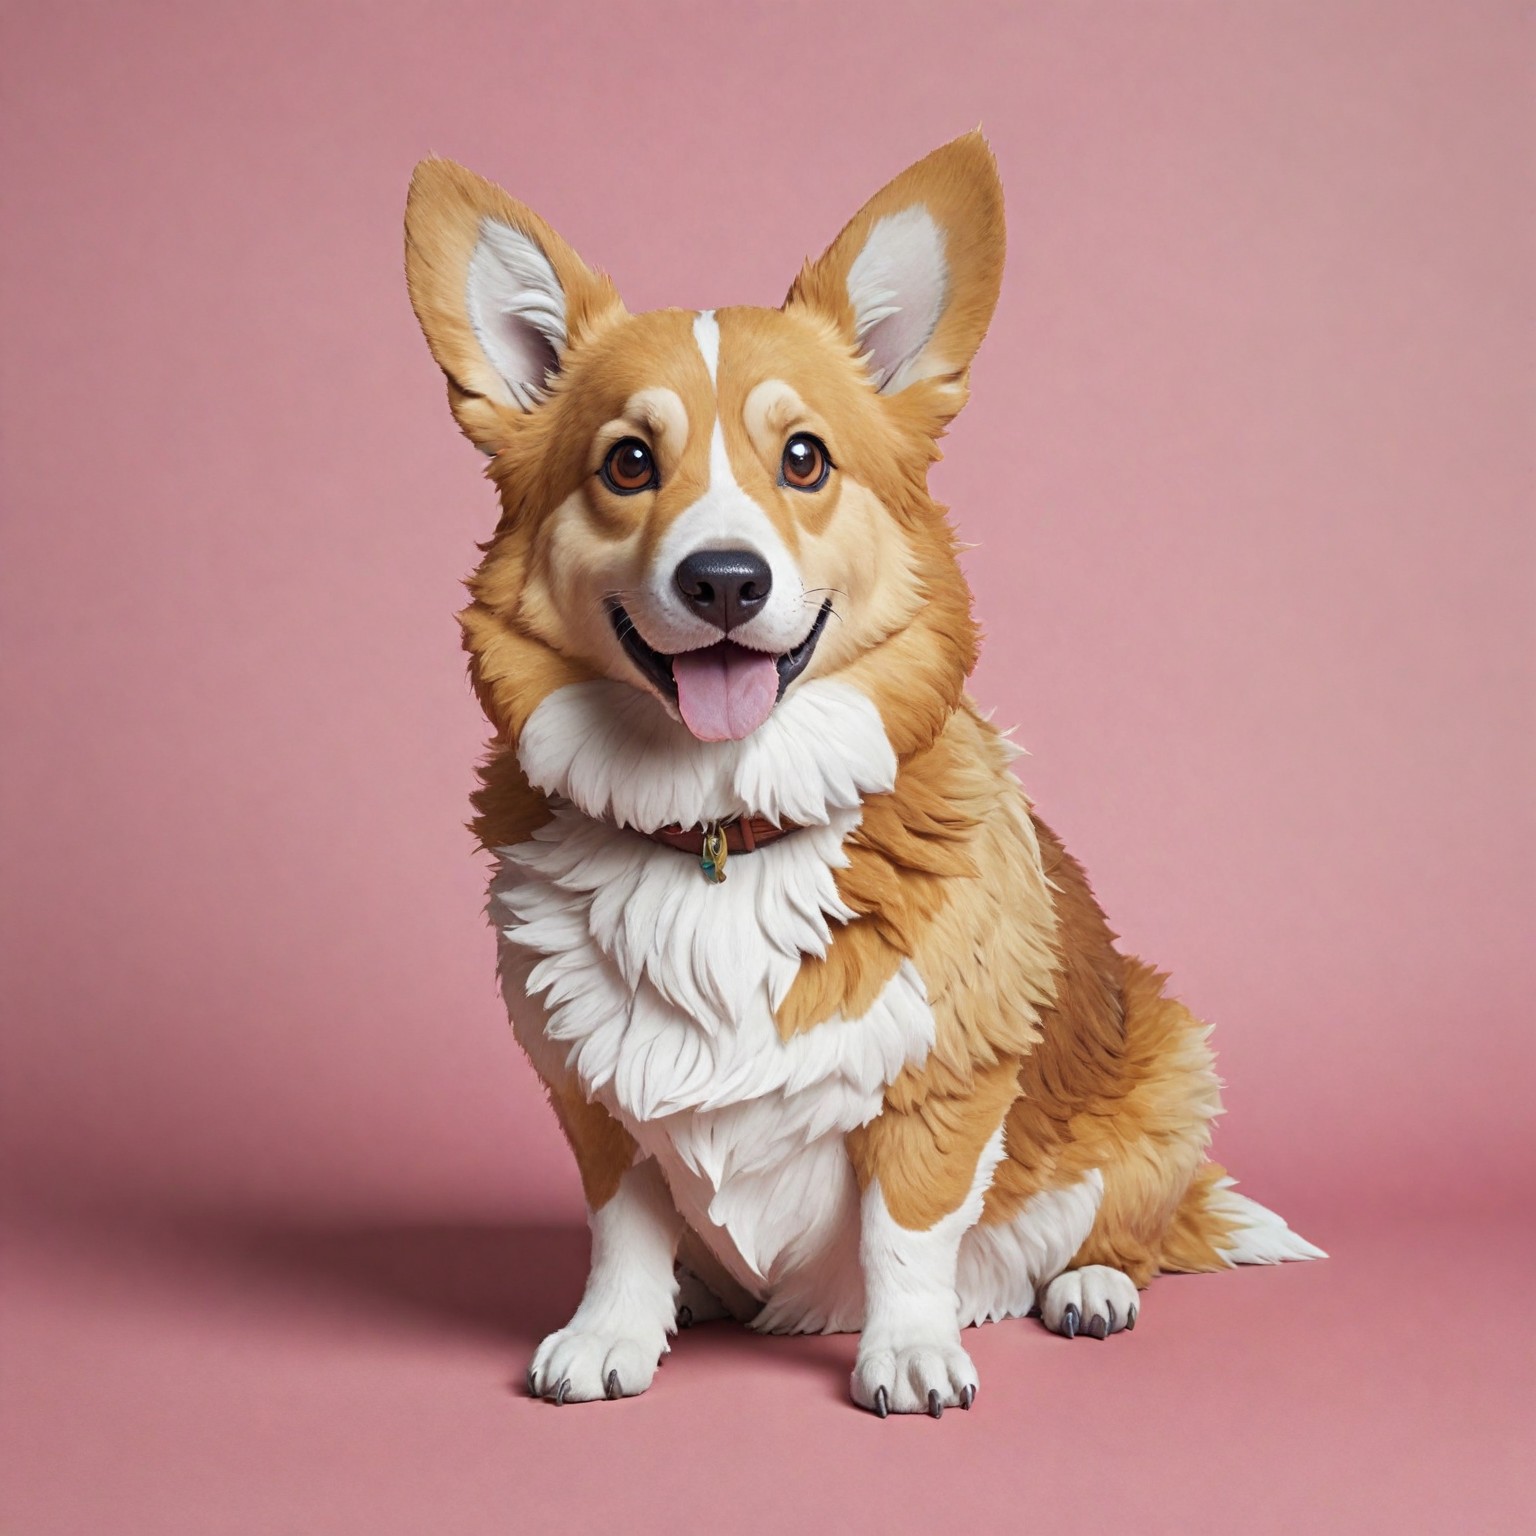
Base image
60% reference strength
50%
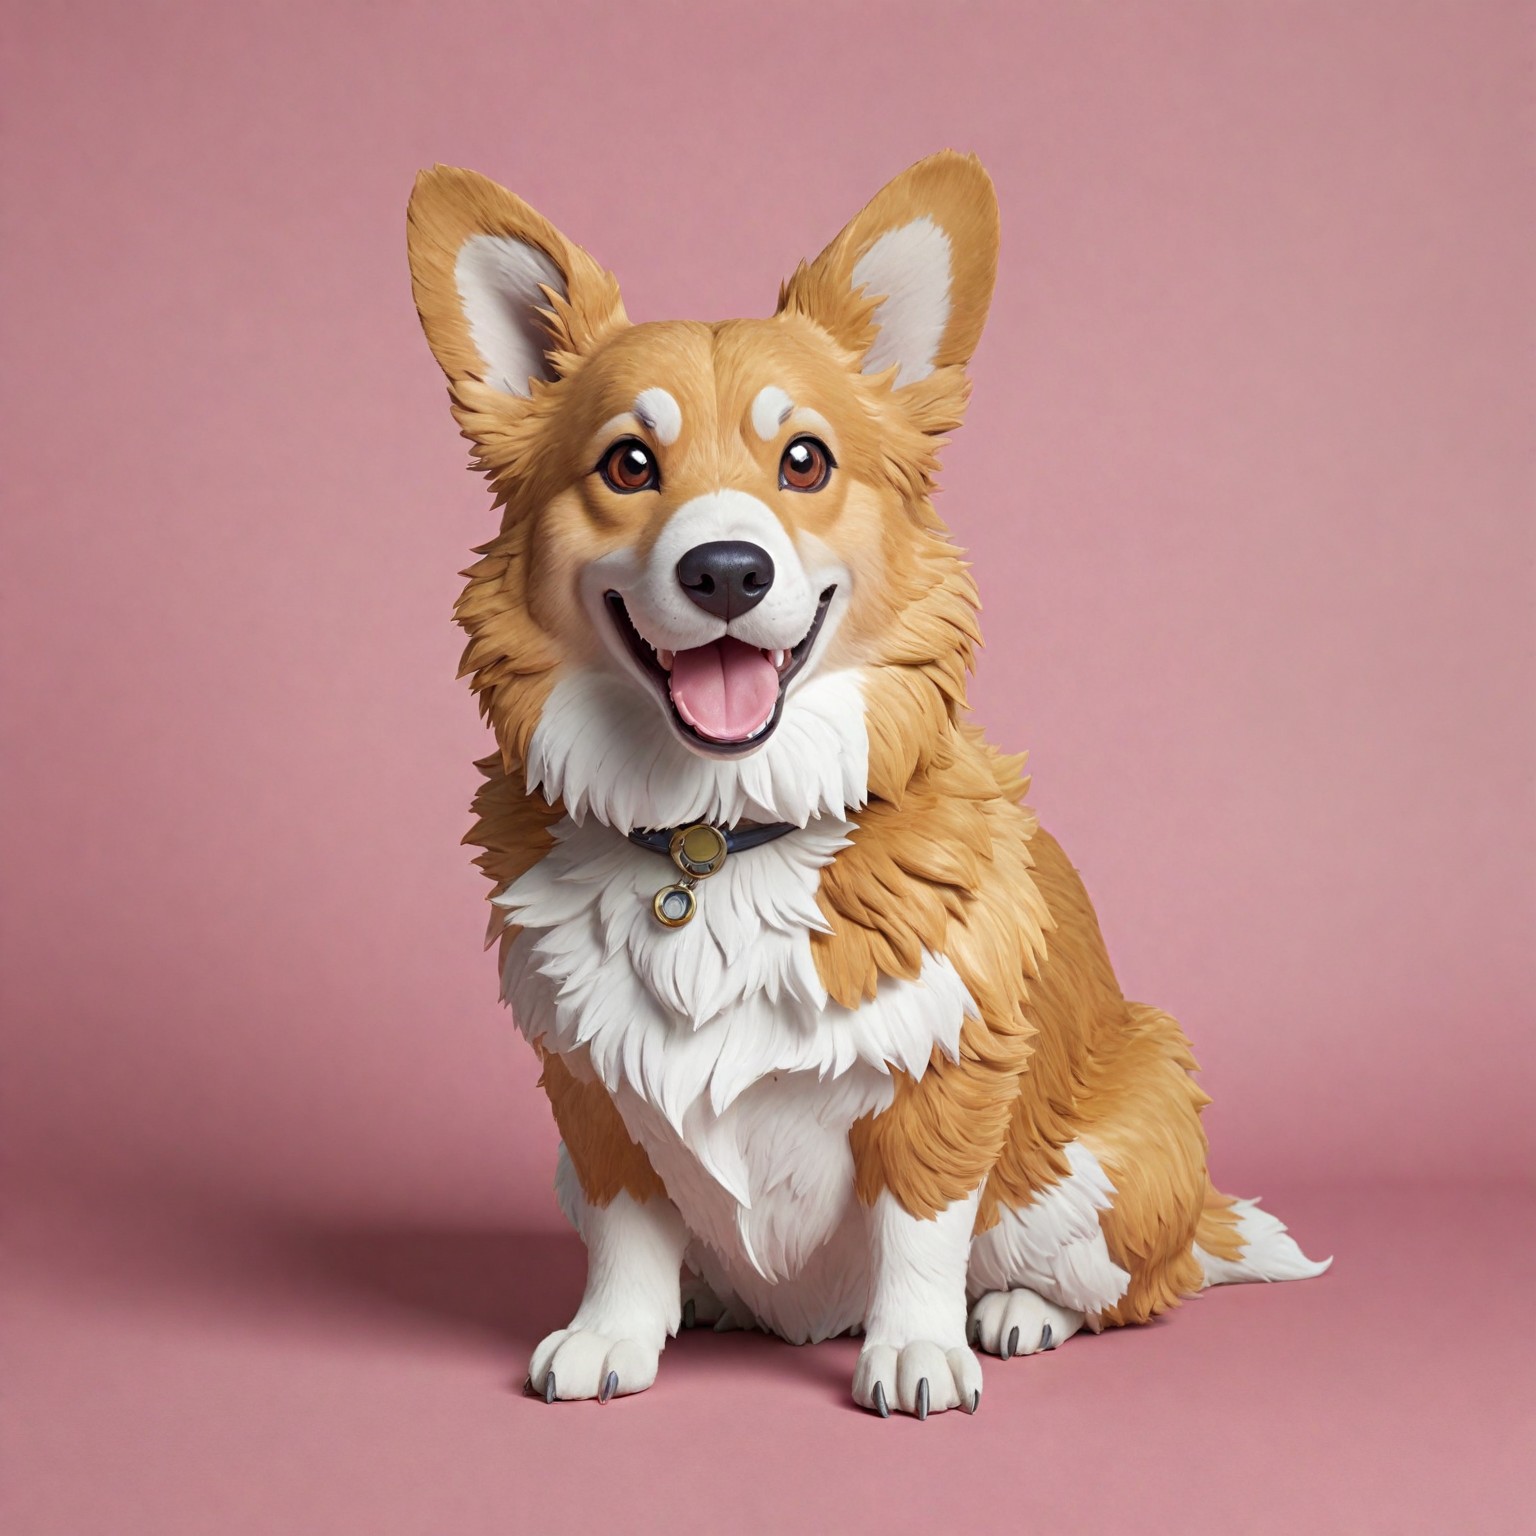
A more balanced setting will cause the pet to be visibly Pokémon-style, but it should mostly retain its original shape and color.

Base image
40% reference strength
30%
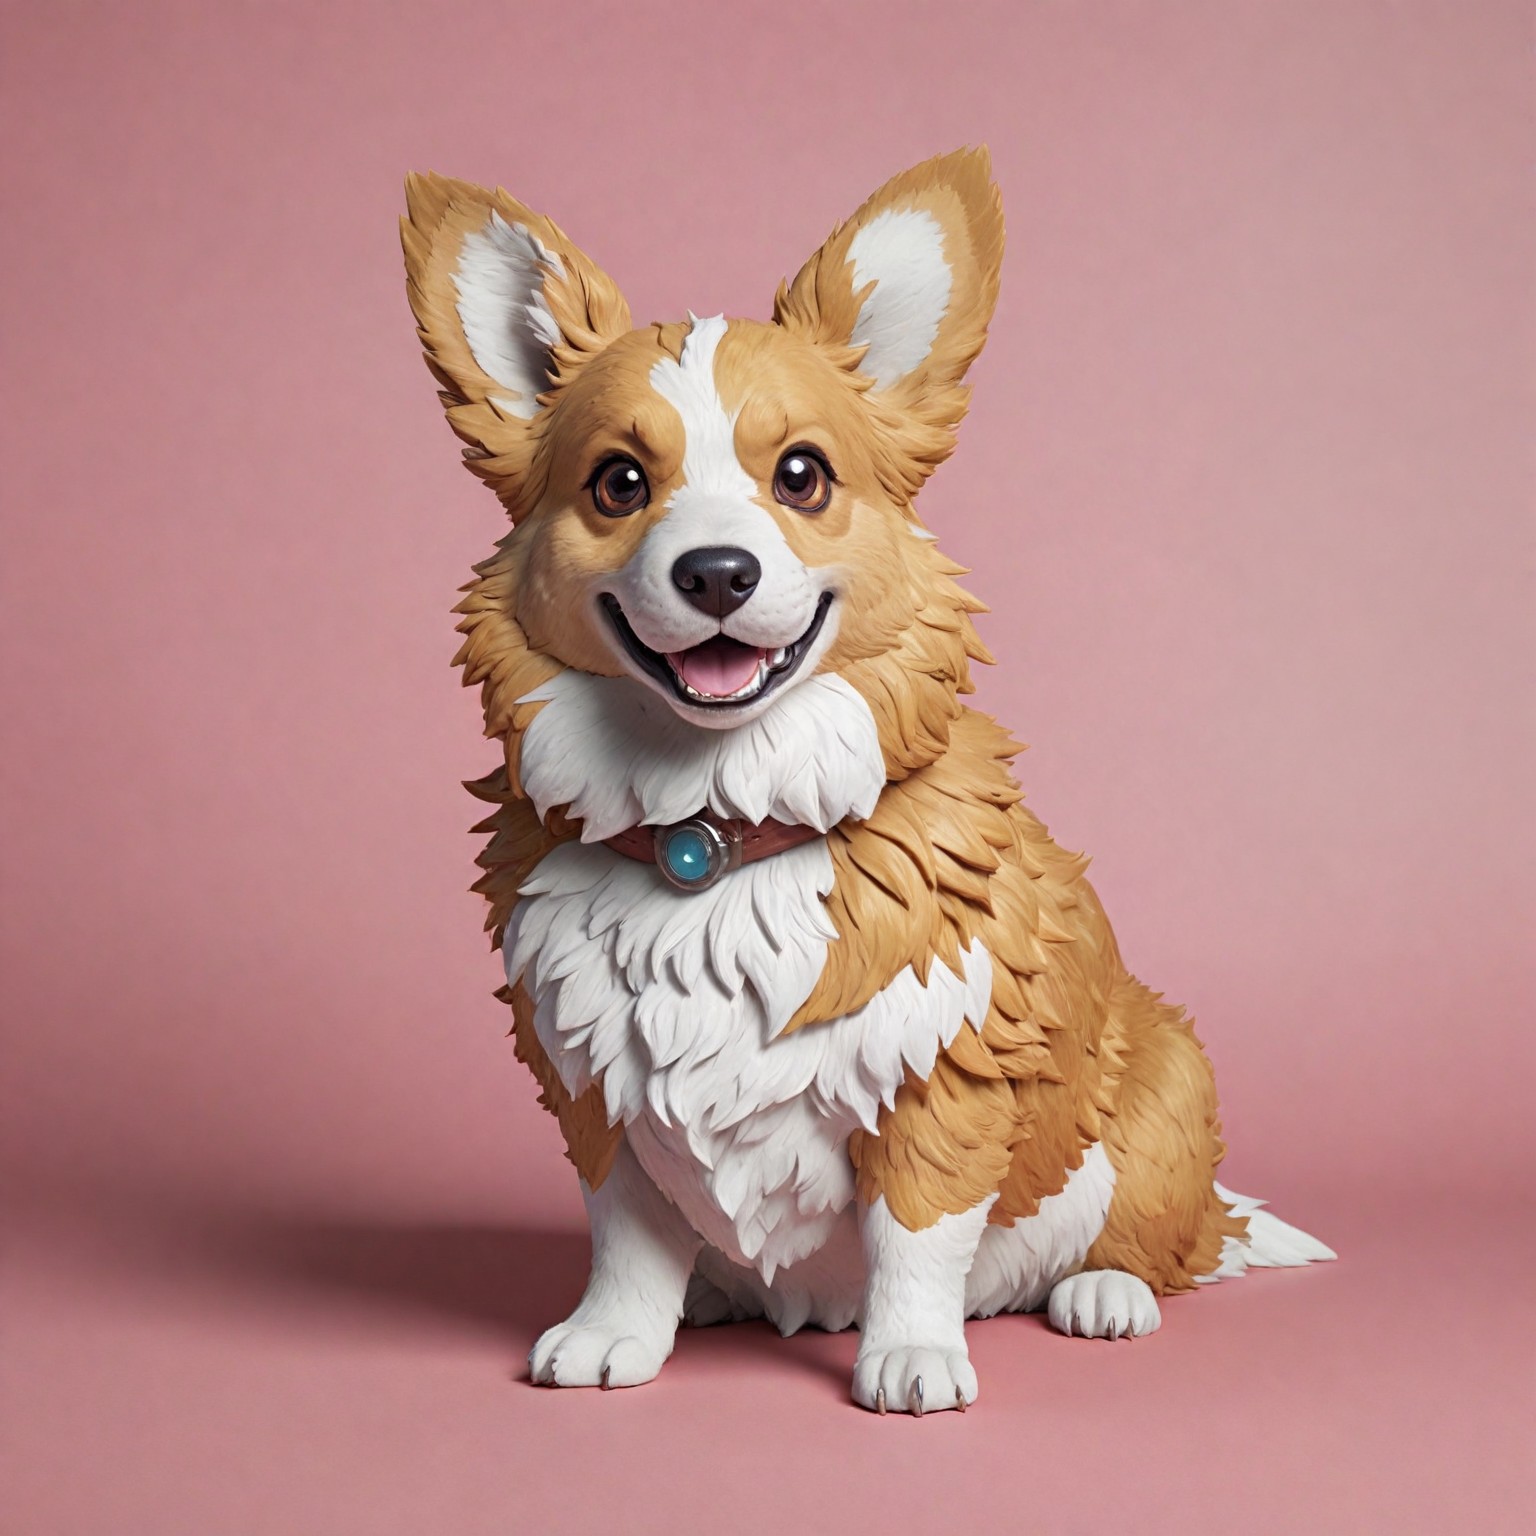
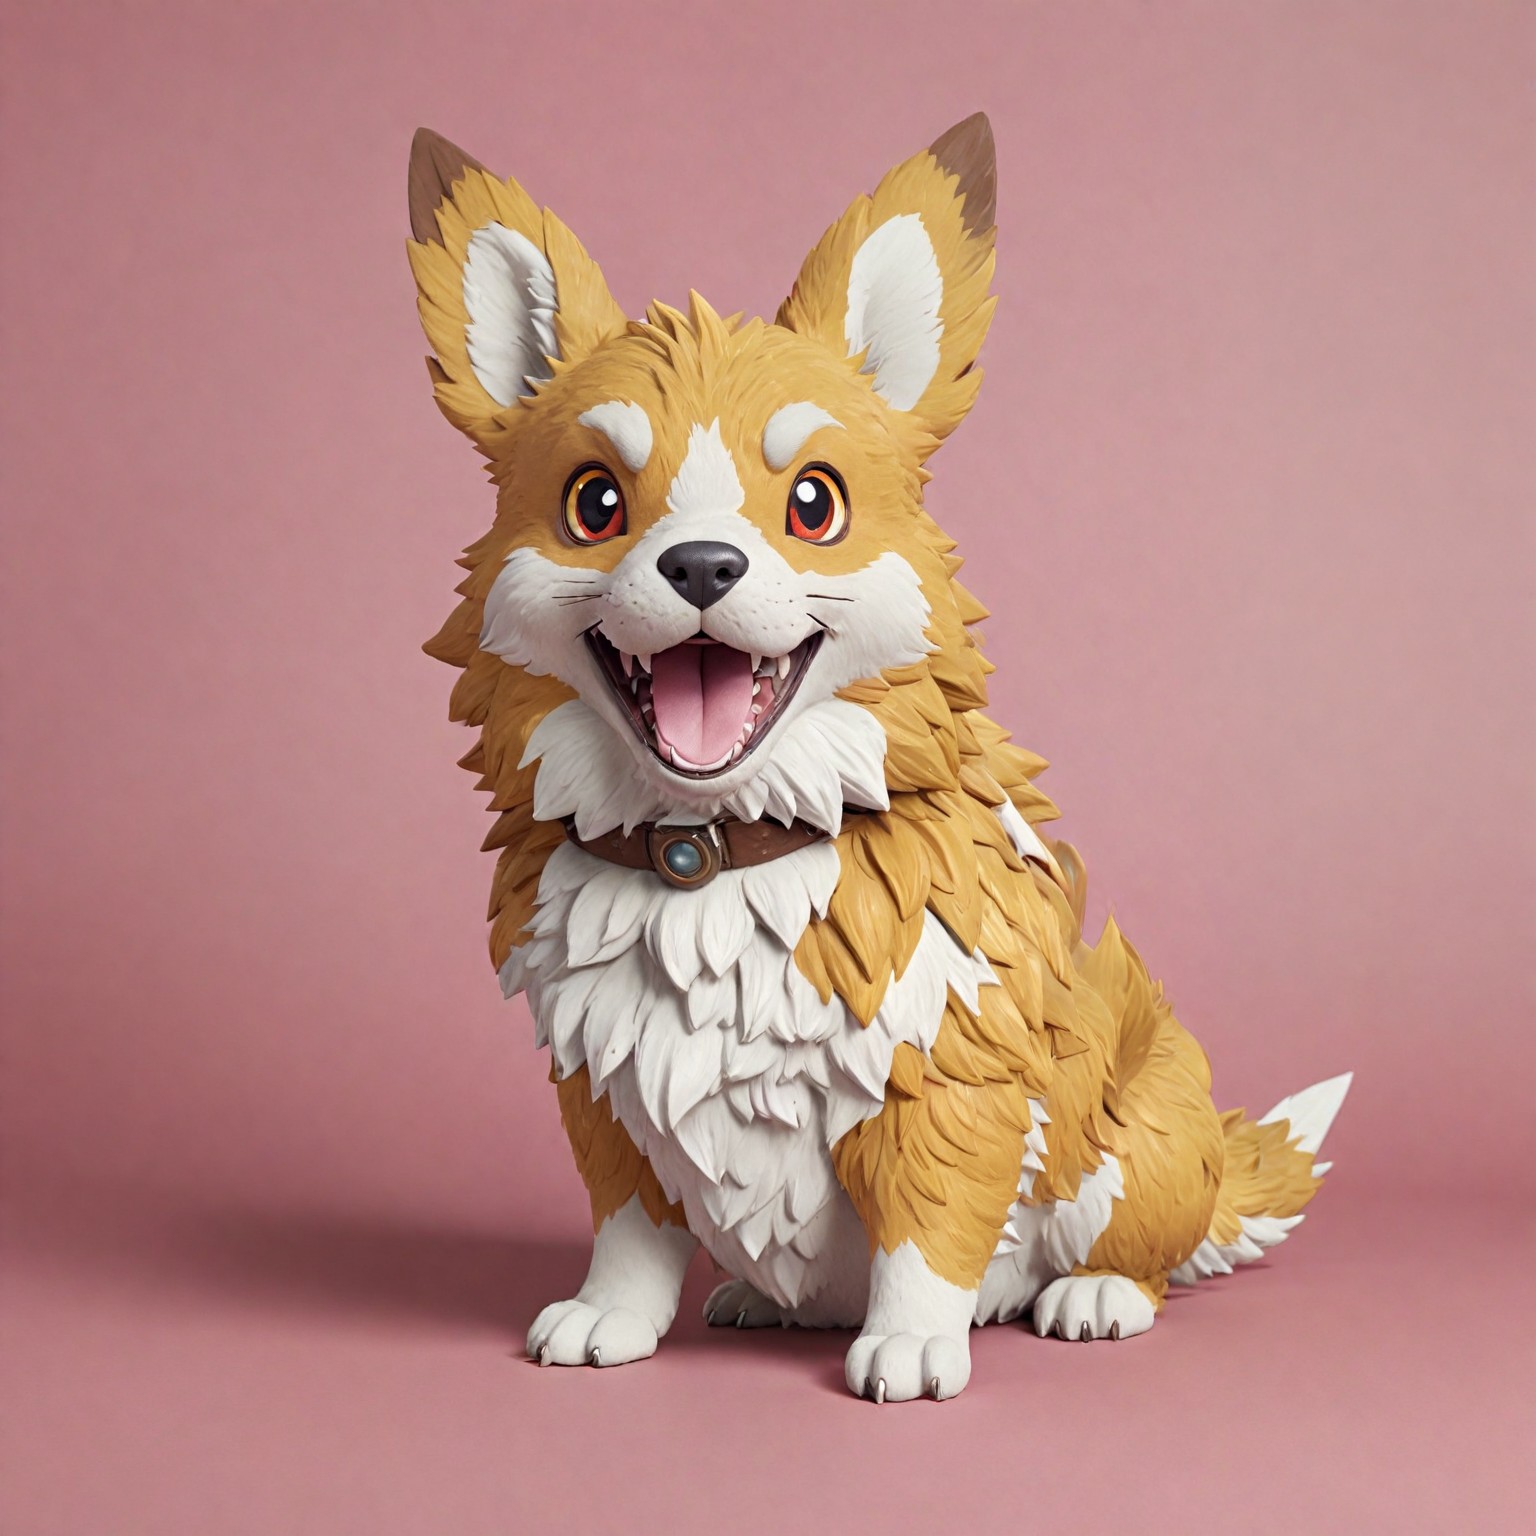
Low reference strength will likely provide more varied results, with some elements added or missing and changes in the color palette. Your pet might turn partially blue or grow wings, for example.

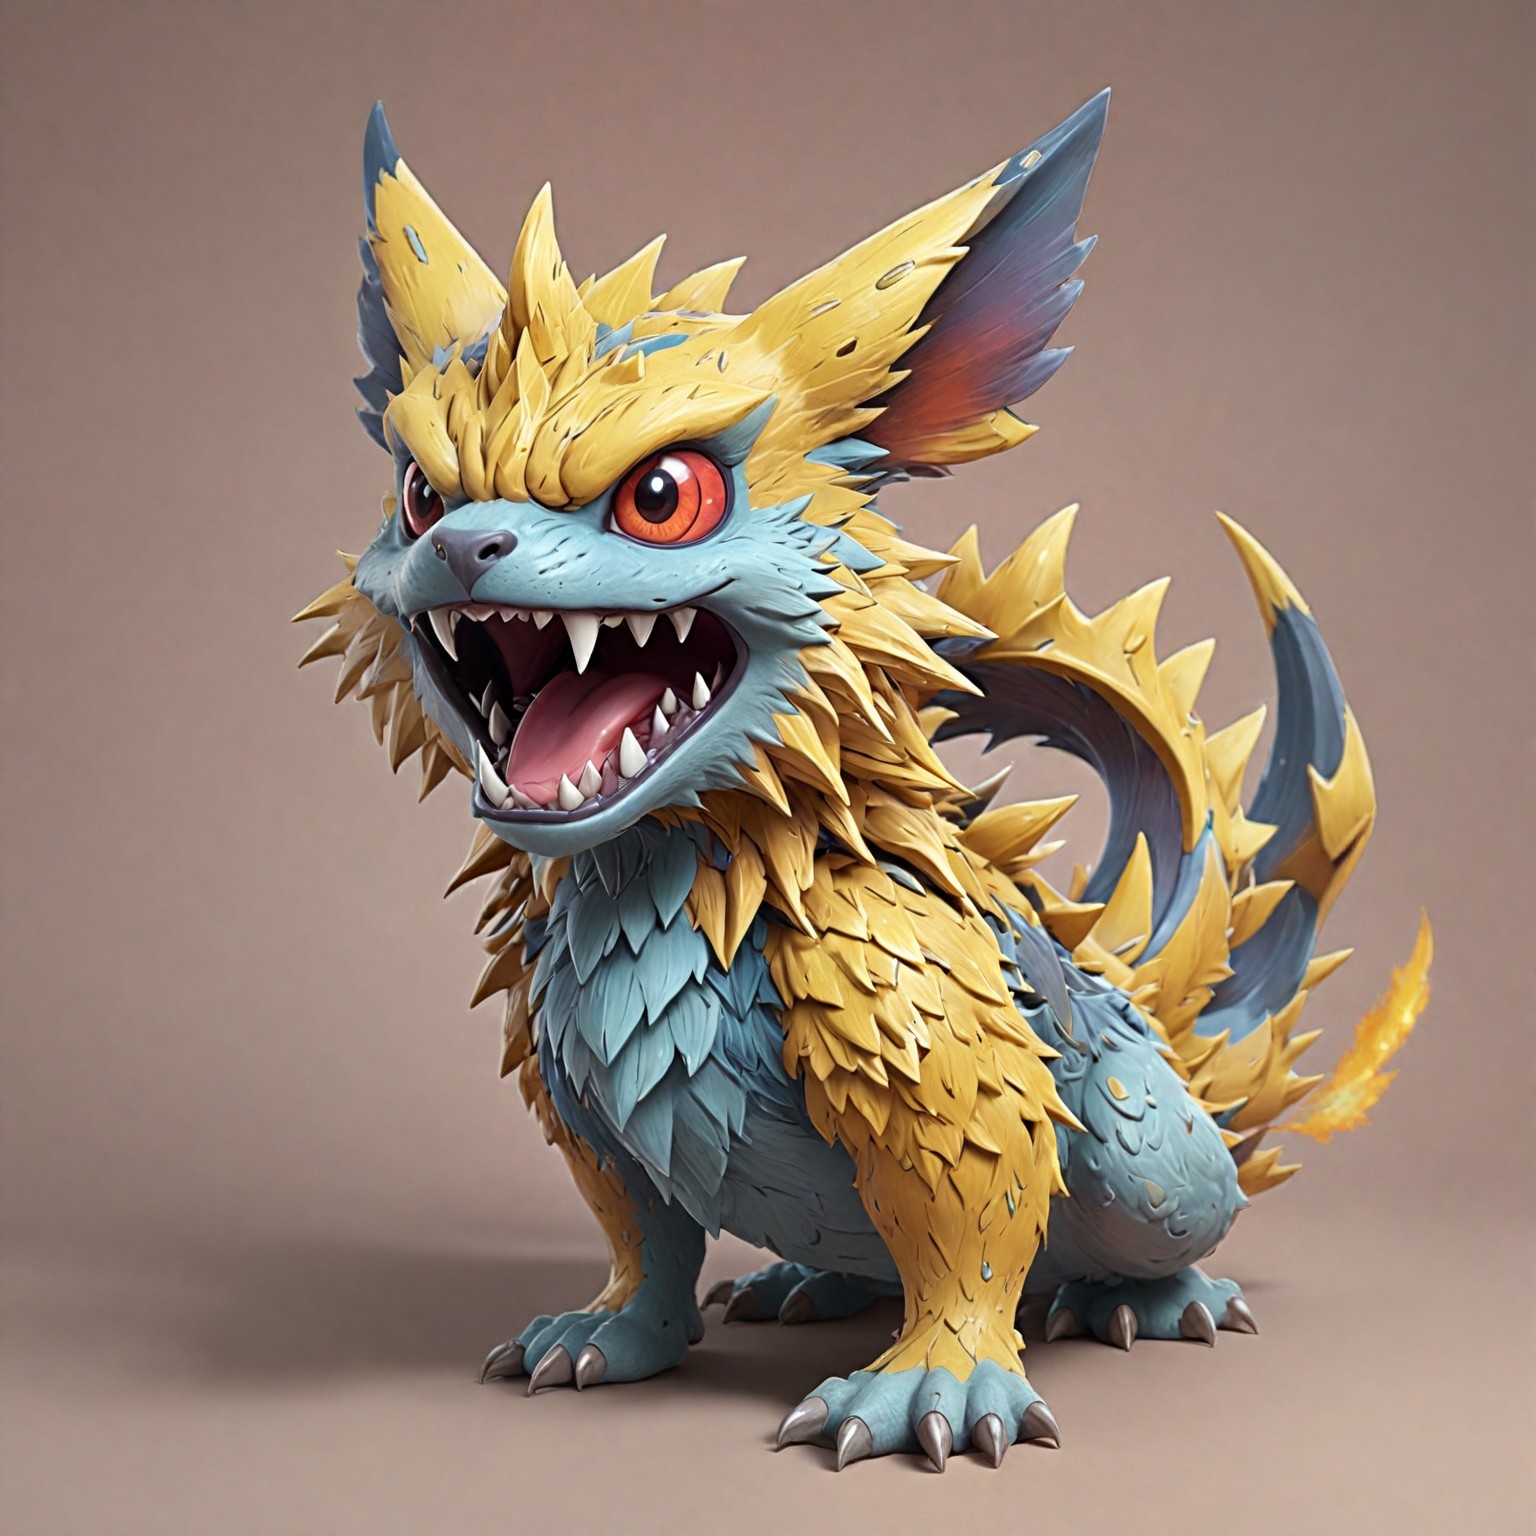
Base image
20% reference strength
10%
Step 5. Generate
Choose the number of images you would like to generate—options range from one to a batch of ten. Finally, click the “Create images” button to initiate the image creation process.
Experiment with different prompts and strength settings to discover the full potential of Image to Image. Learn about ControlNet and IP Adapters to fine-tune your image even more.
With Multiple Image References, you can combine Image to Image with other reference types, such as Character, Hard Edges, or Pose.