Guide to Navigating getimg.ai
Here’s a quick overview of getimg.ai: how to navigate, what every control does, and where to find it.
🏠 Home
When you log into getimg.ai, you land on Home. From here you can generate images & videos straight from the prompt box, jump into one of the most common actions, scan recent changelog entries, and open learning resources like guides and tutorials.
📂 Sidebar Navigation
On the left side, you’ll find your main navigation, grouped into three sections.
- Home takes you back to your launchpad anytime.
- Actions: grouped into Image, Video, and Audio. Click a group to unwind it, then open any task on its own dedicated page:
- Image: Create image, Resize image, Remove background, Upscale image
- Video: Create video, Upscale video
- Audio: Create music, Create speech, Create sound effect.
Each action page has a prompt box (or upload area) at the bottom and a gallery above it showing everything you’ve made with that action.
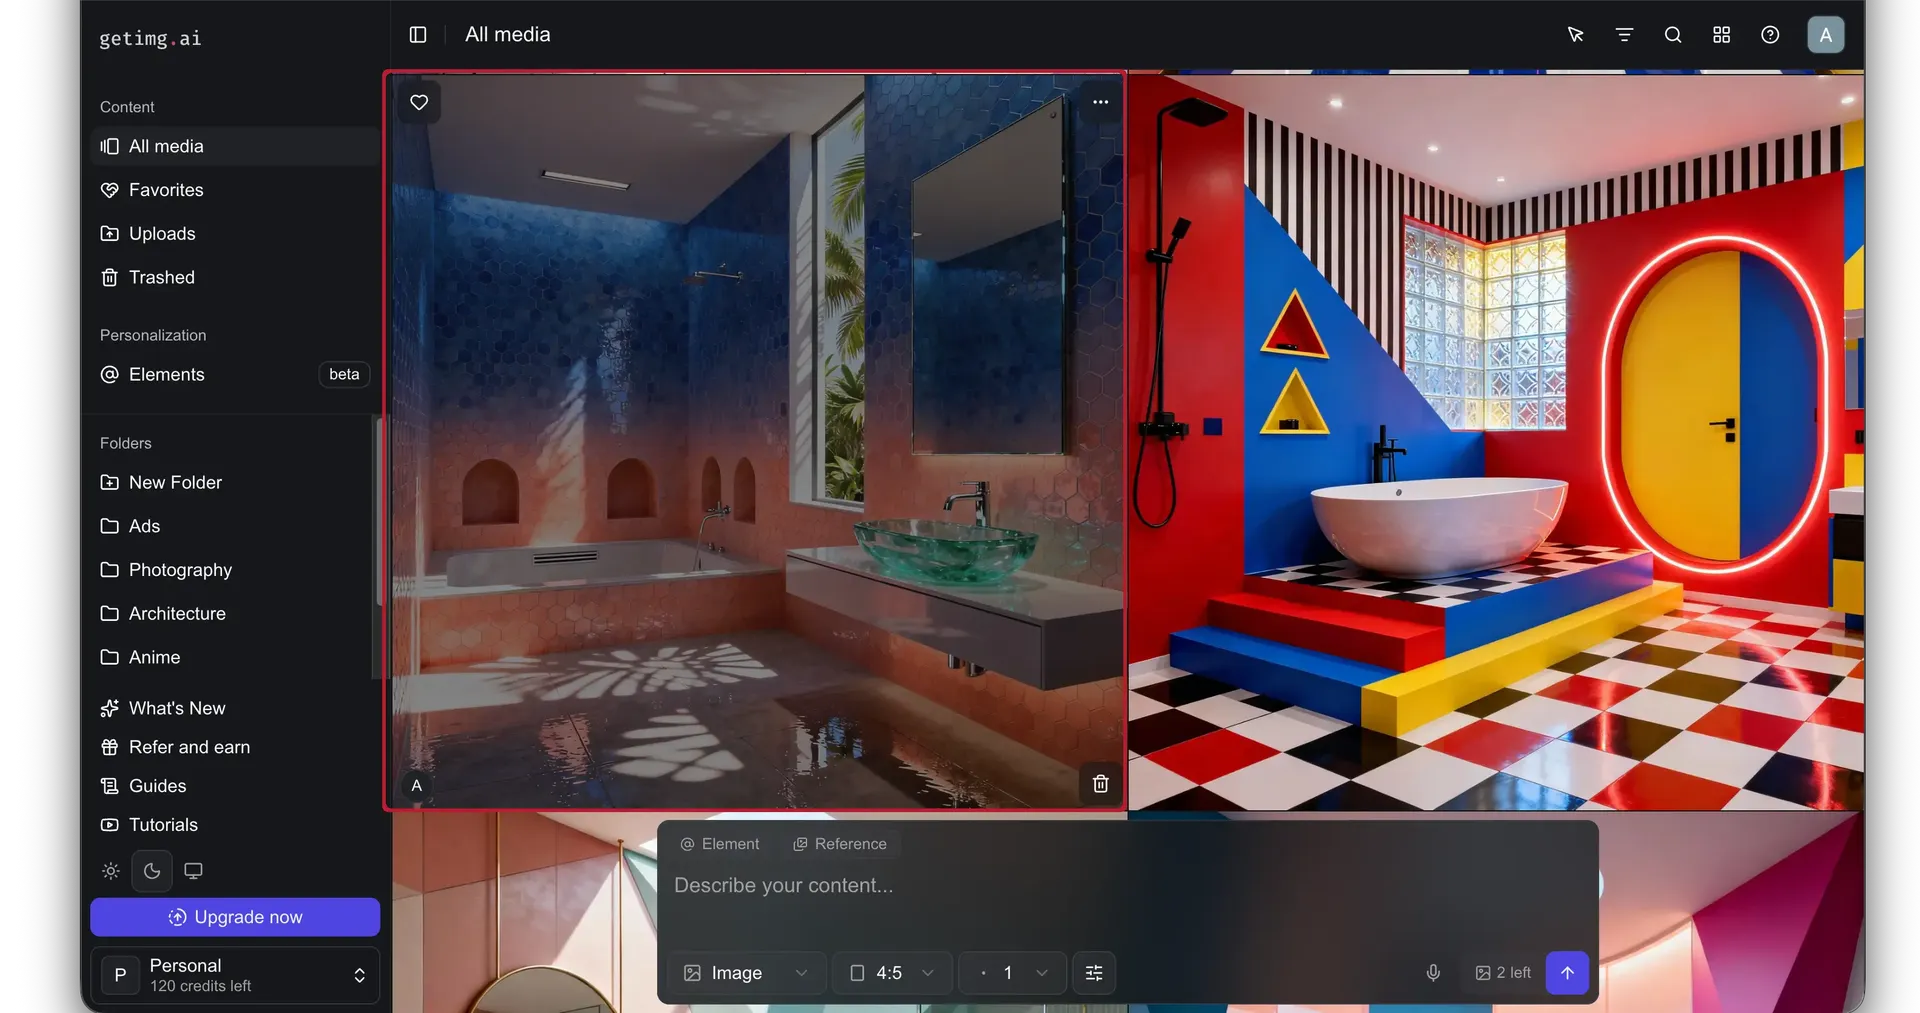
- Content: your library, sorted from newest to oldest:
- All media: your complete library of generated images and videos.
- Favorites: content you’ve liked by clicking the heart icon.
- Uploads: all images you’ve uploaded.
- Trashed: deleted items stay here for 30 days before being permanently removed.
Learn more about uploading images →
- Personalization:
- Elements: reusable people, products, styles, and other visual concepts you can reference in prompts using
@ElementName.
- Elements: reusable people, products, styles, and other visual concepts you can reference in prompts using
💬 The Prompt Box
The prompt box is the core of getimg.ai. You’ll find it on Home and on the Create image, Create video, Create music, Create speech and Create sound effect pages, each with the controls that fit what it makes.
Here’s what you can do:
- Type your prompt: describe what you want to generate. You can also press the microphone icon to dictate your prompt.
Take a look at the Image Prompt Book and the Video Prompt Book →
- Use Elements: press the Elements button to reuse people, products, styles, and other concepts you’ve already defined.
- Add references: click the Reference button to attach up to 10 reference images from your generated media, uploads, or by uploading new ones. In Create video, you can also pick a First and Last frame for the video.
Read the guides to image references and video references →
- Adjust parameters:
🟣 Click the model button in the bottom left of the prompt box (showing Auto or the current model name) to switch between Auto and a specific model. From the same menu you can toggle prompt enhancement on or off (Auto needs it on).
🟣 Set aspect ratio.
🟣 Pick how many outputs to generate (up to 16 images or 4 videos).
🟣 For videos, set duration.
🟣 On select models you’ll also see a quality switch.
Check out the Guide to Custom Generation Parameters →
- Generate: press the arrow button →.
🧭 Top Bar Controls
At the top of your workspace, you’ll find:
- Sidebar toggle: open or close the sidebar.
- Search: find any image or video by typing keywords; results are sorted by date.
- Feedback: send us a note about your experience.
- Help: quick links to guides, video tutorials, our social media, our email, and terms & policies.
- Avatar (top right): click your avatar to switch between Teams, open Account or Workspace settings, invite teammates, manage your subscription, change theme, or log out.
Learn more about Teams →
🧰 Gallery Toolbar
In action and folder views, look to the top right corner below the top bar for a small box of tools:
- Select: pick multiple images or videos at once. From here you can move them to folders, add them all to favorites, trash them, or export them.
- Filter: when working in a Team, toggle between Me (only your creations) and Team (everything anyone made).
- Layout: switch the gallery between aspect-ratio view (true proportions) and square view, and adjust how many columns you see at once.
- Folders: open the right-hand sidebar to browse your folders and switch between them. Click the three dots icon to rename or delete it. Click the folder icon again to close the sidebar.
Learn more about folders →
🖱️ Working with Images and Videos (Hover Options)
When you hover over an image or video, several quick actions appear:
- Heart (top left): like or unlike the image.
- Three dots (top right): open the menu for more options:
🟣 Like / unlike
🟣 Download
🟣 Manage folders (add or remove the image from specific folders)
🟣 Trash
🟣 Edit (for images only)
🟣 Upscale (for images only)
🟣 Upscale video (for videos only)
🟣 Remove background (for images only)
🟣 Resize (for images only)
🟣 Use the prompt that created this image or video
🟣 Use image as a reference (for videos only)
🟣 Use image as first frame (for videos only)
🟣 Recreate using the same prompt, references, and parameters.
- Author badge (bottom left): shows who created it, especially helpful when working in a Team.
- Trash icon (bottom right): delete the image or video.
🔍 Full Image/Video View
Click any image or video to open it in full view.
On the right panel, you’ll see:
- Type (Image or Video)
- Size (in pixels)
- Model
- Author
- Exact creation time
- Prompt (with a Copy button)
- References (if any were used).
To the left of that panel, you’ll find a set of icons to:
- Like
- Download
- Manage folders (assign or unassign the image or video from folders)
- Trash (delete).
Below the image or video, you’ll find an editing prompt box (with the ability to add extra reference images and choose an editing model).
You can type an edit prompt here (for example, “remove the background” or “make it black and white”) and generate a new image while keeping the original untouched.
Use your arrow keys (← →) to browse between images, and press Esc to exit full view.
✅ Quick Recap
Once you know your way around, everything in getimg.ai becomes simple:
- The sidebar helps you navigate
- The prompt box is where creation happens
- The top bar and gallery toolbar fine-tune your view
- And the hover and full view tools let you manage, edit, or recreate anything instantly.
Your workspace is built to stay fast, clear, and creative, so you can focus on what actually matters: making.